
Saga of the Nine Worlds: The Gathering: Chapter 1 Enter the Forest
Our Saga of the Nine Worlds: The Gathering Walkthrough is filled with simple instructions and colorful screen shots to help you solve this epic hidden objects adventure!
General Tips & Information
Chapter 1 Enter the Forest
Chapter 2 The Sandfell
Chapter 3 Lower
Chapter 4 Jotuneim
Chapter 5 The Altar
Chapter 6 The Harbor
Ask for help in the comments below!
Chapter 1 Enter the Forest
Chapter 2 The Sandfell
Chapter 3 Lower
Chapter 4 Jotuneim
Chapter 5 The Altar
Chapter 6 The Harbor
Ask for help in the comments below!
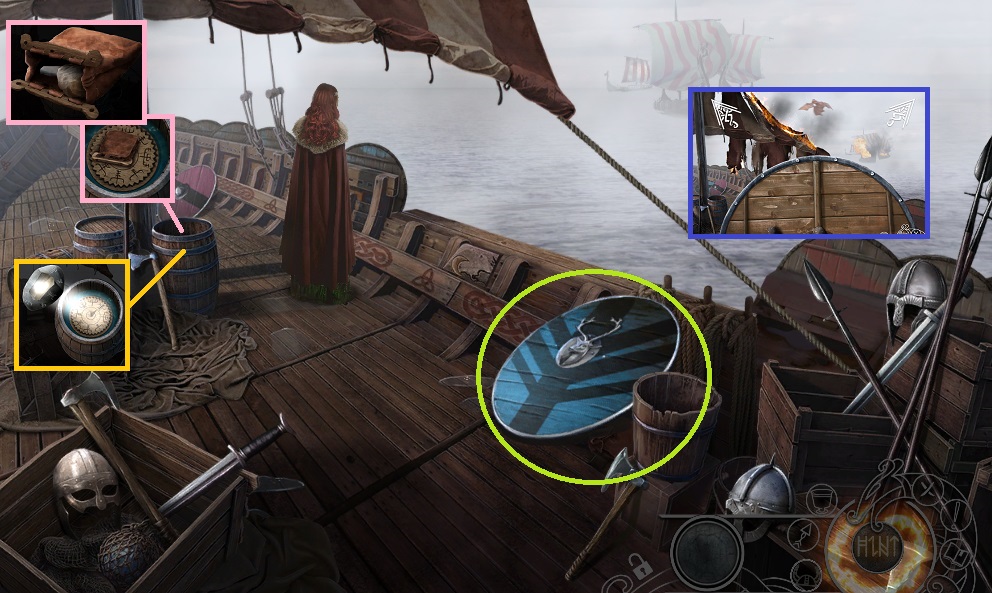
- Collect the pouch; click it open.
- Collect the pin- sunstone – cloth & chalk.
- Properly align the sunstone.
- Click the shield to trigger a mini game.
- Solve the game by using the arrows to protect yourself from the attack.
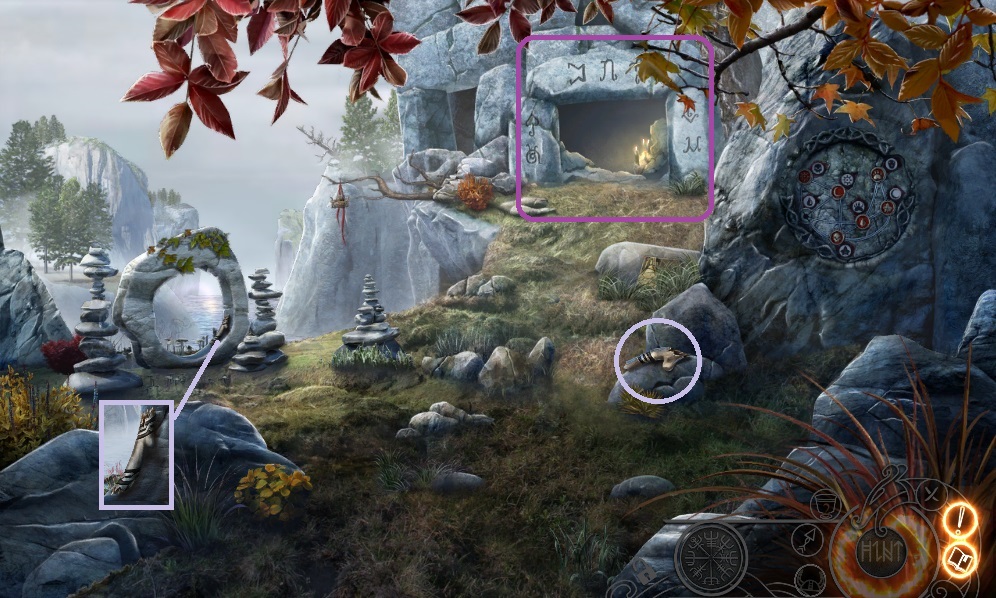
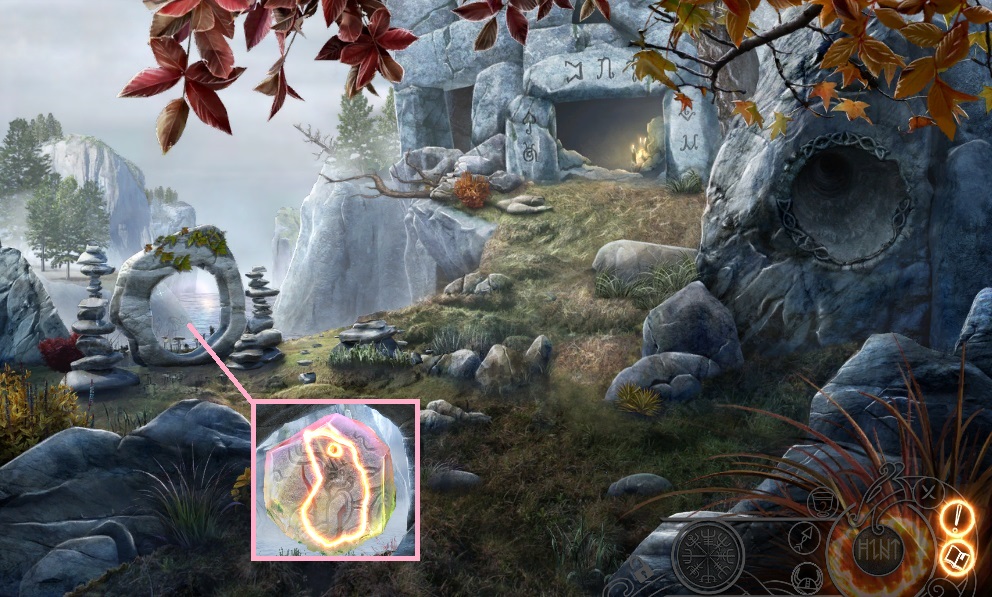
- Speak to the man- click the scene to trigger the hidden objects area.
- Find the item through the fog.
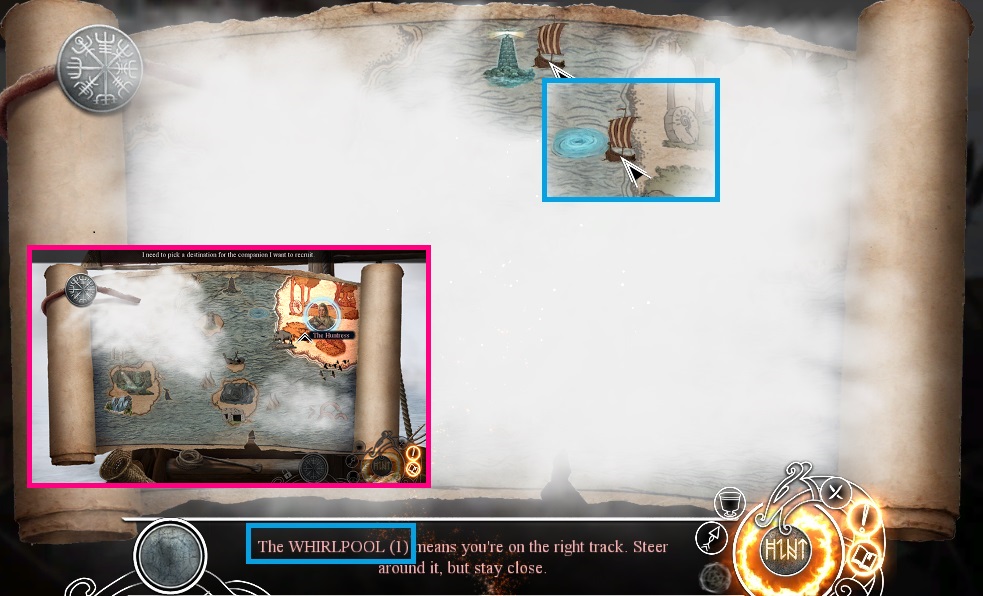
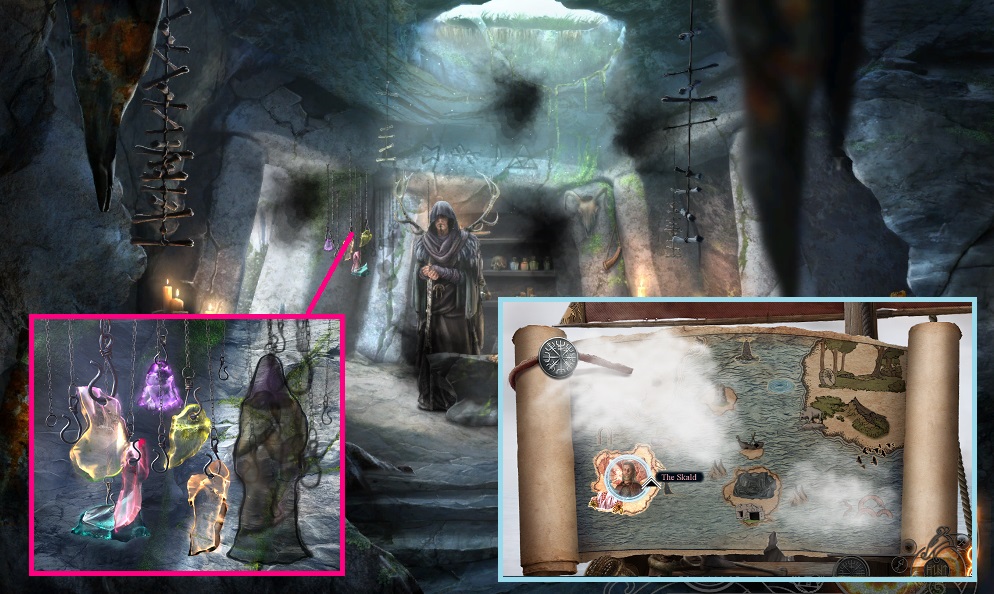
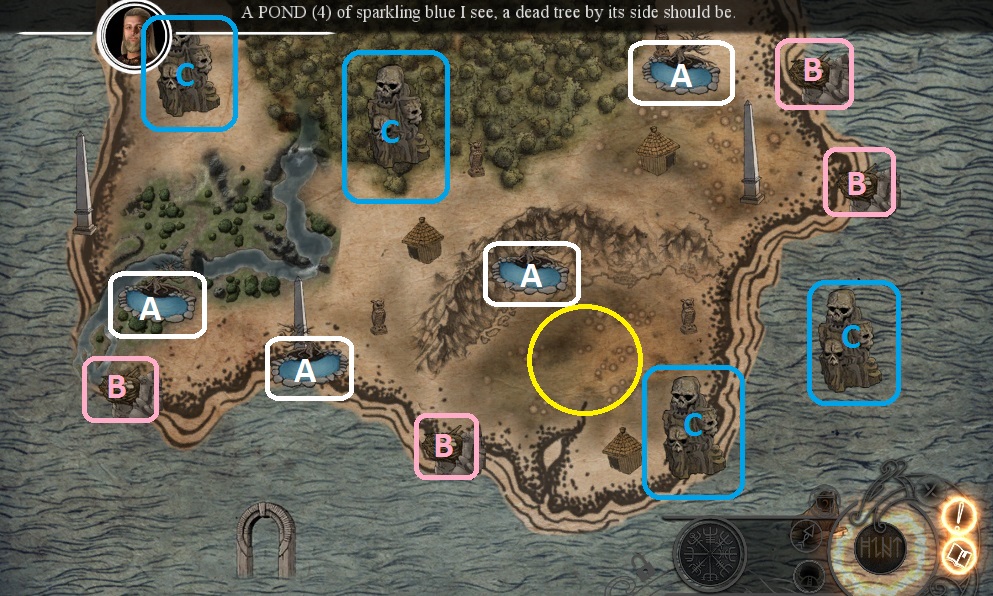
- Select the huntress area on the map.
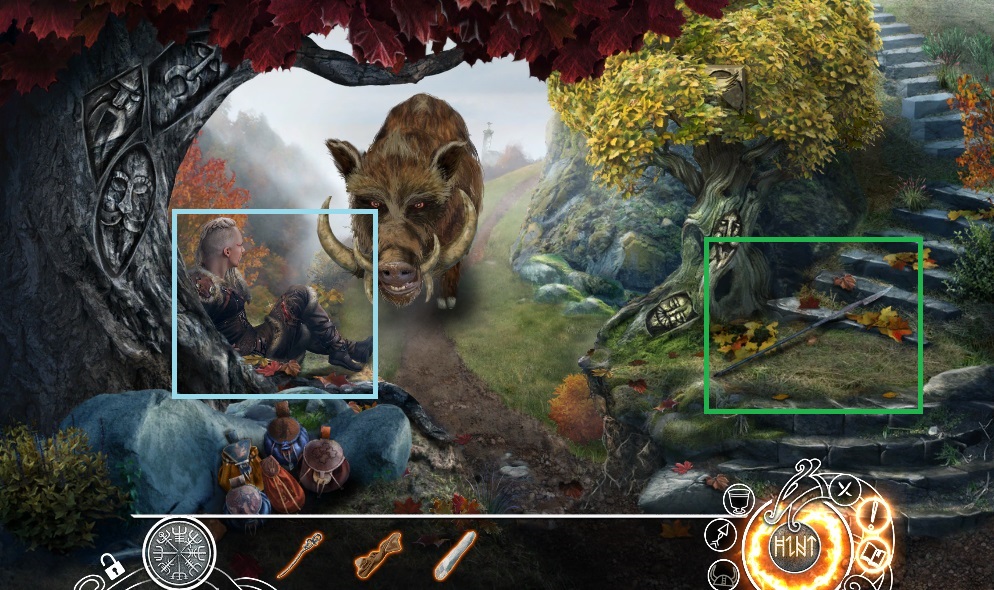
- Give the huntress the spear.
- Move right.
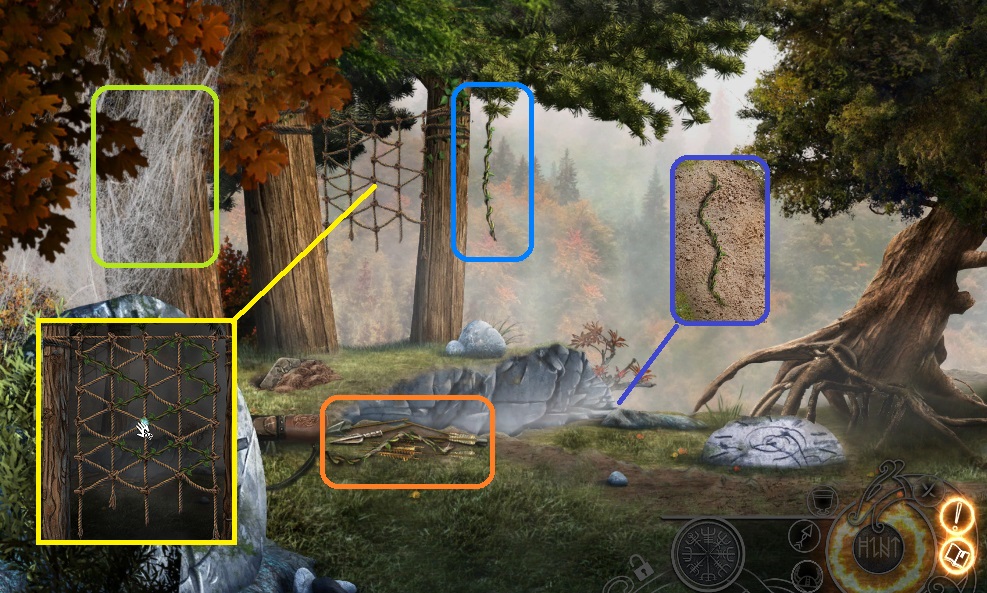
- Click the cobweb 3x’s – collect the arrowhead & vine.
- Collect the remaining 2 vines.
- Zoom into the vines.
- Place the 3 vines & arrange them correctly.
- Collect the net.
- Look over the cliff.
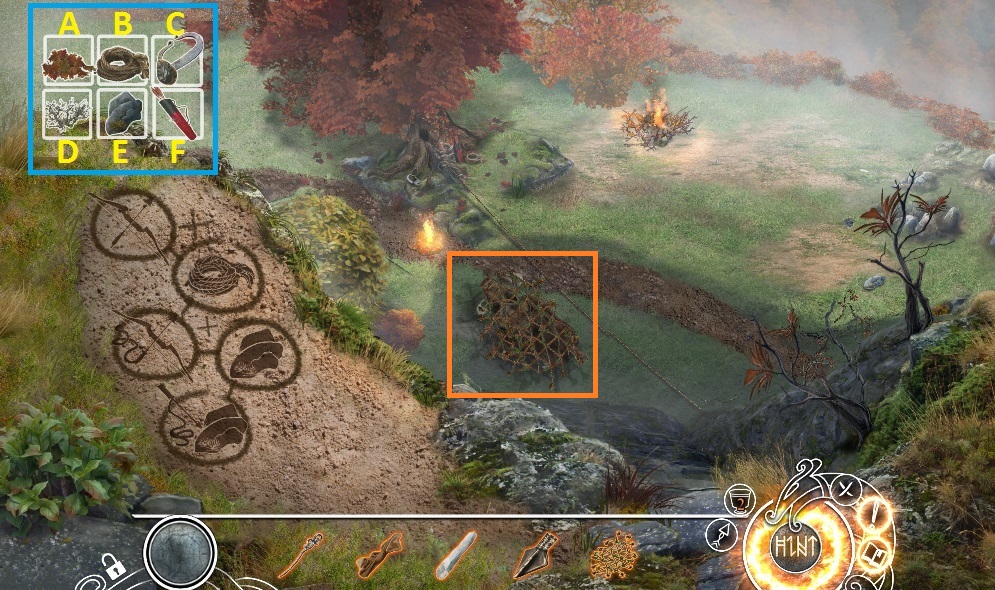
- A mini game will trigger.
- Solve the game by correctly planning your strategy.
- Solution: (c-a) (f-c-d) (b-e); toss the net.
- Move down once.
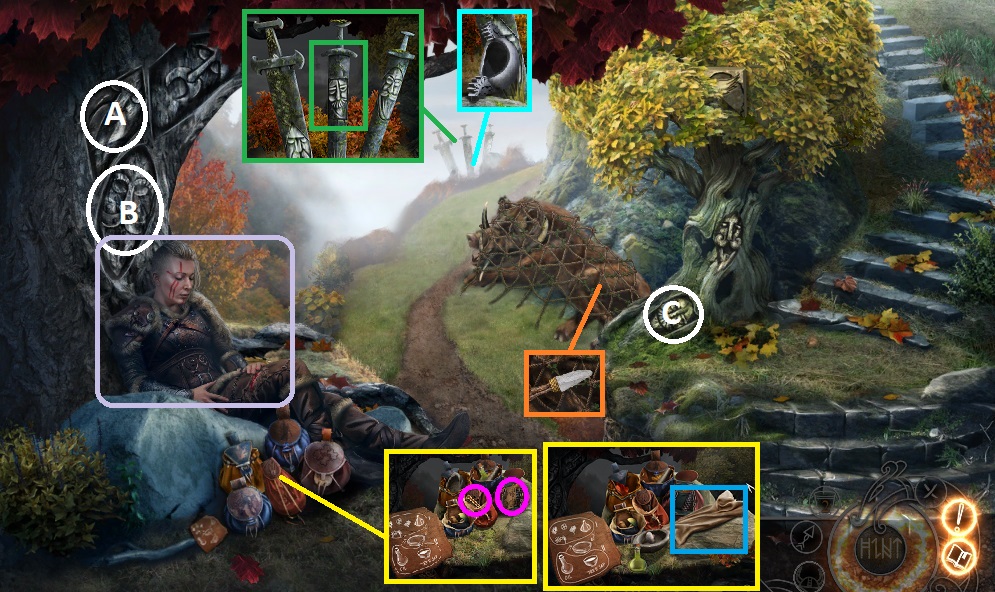
- Collect the offering bowl.
- Use the arrowhead to remove the moss.
- Click the faces (a-b-c); collect the ritual dagger & use it to collect the lock of fur & use it to place on the wounds.
- Collect the sap spile & plant etchings.
- Click & place the cloth.
- Move right.
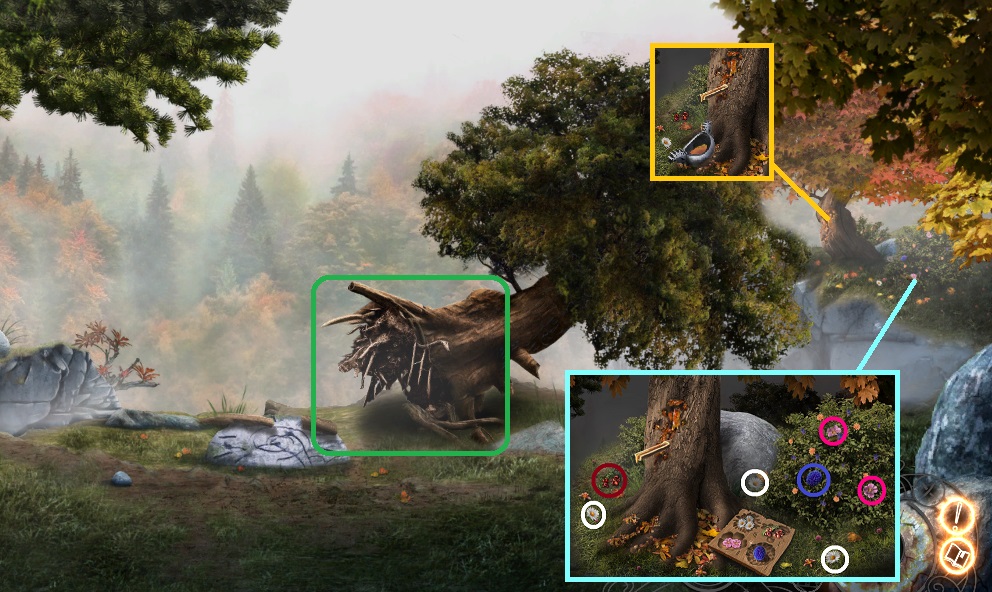
- Use the ritual dagger 3x’s on the tree roots.
- Zoom to the right.
- Zoom into the tree – use the sap spile & offering bowl to collect the tree sap.
- Place the plant etchings – click the flowers – collect the plants.
- Move down once.
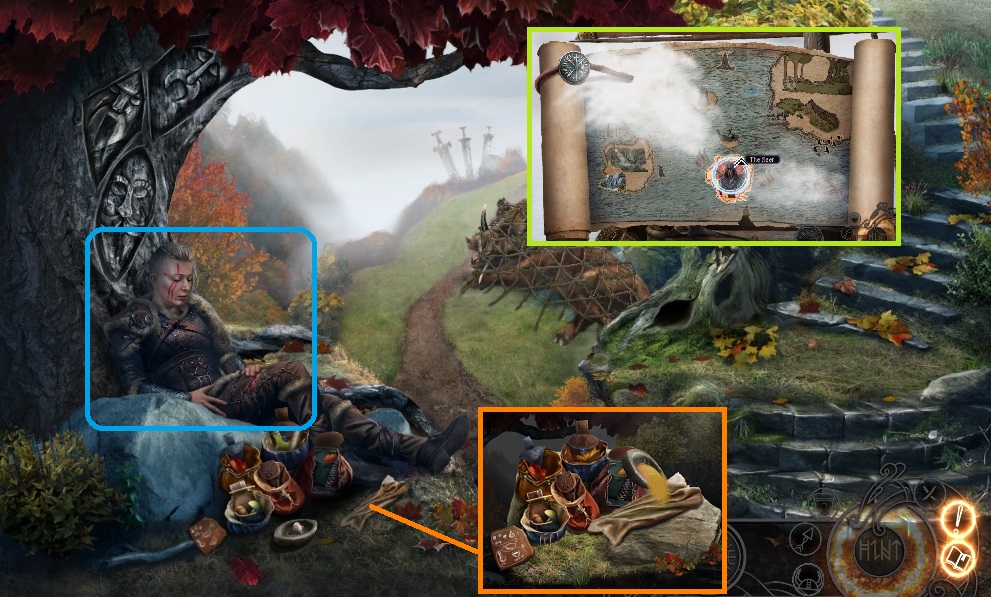
- Place the plants into the bowl – click the bottle.
- Place the tree sap into the bowl – click the cloth.
- Collect the herbal remedy & use it to help the huntress.
- Click the seer area on the map.
- Collect the staff fragments.
- Move to the Desolate Chamber.
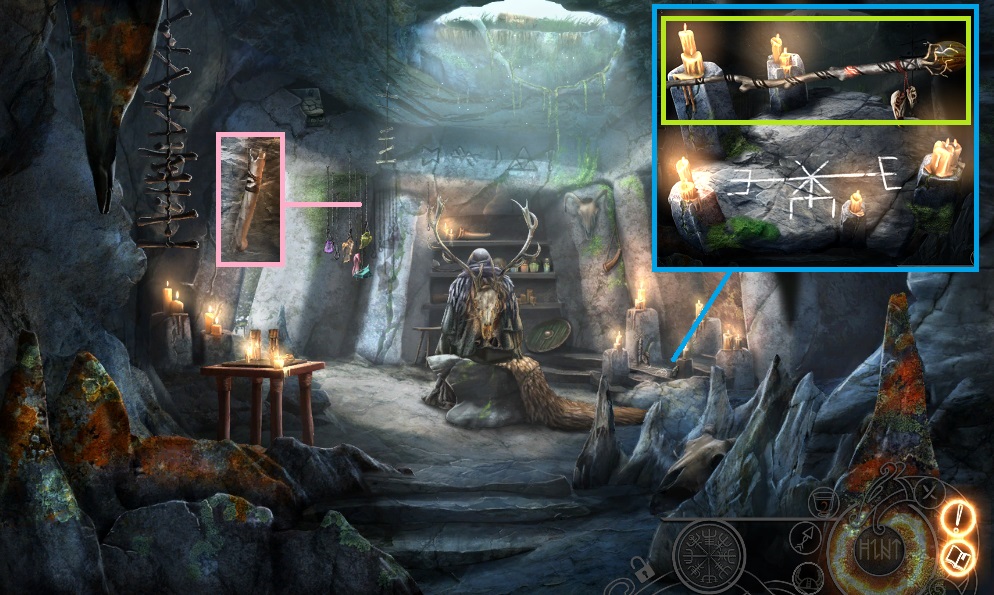
- Collect the staff fragment.
- Place the staff fragments & chalk onto the stump - Click the staff fragments.
- Draw the lines.
- Collect the crude staff.
- Move down once.
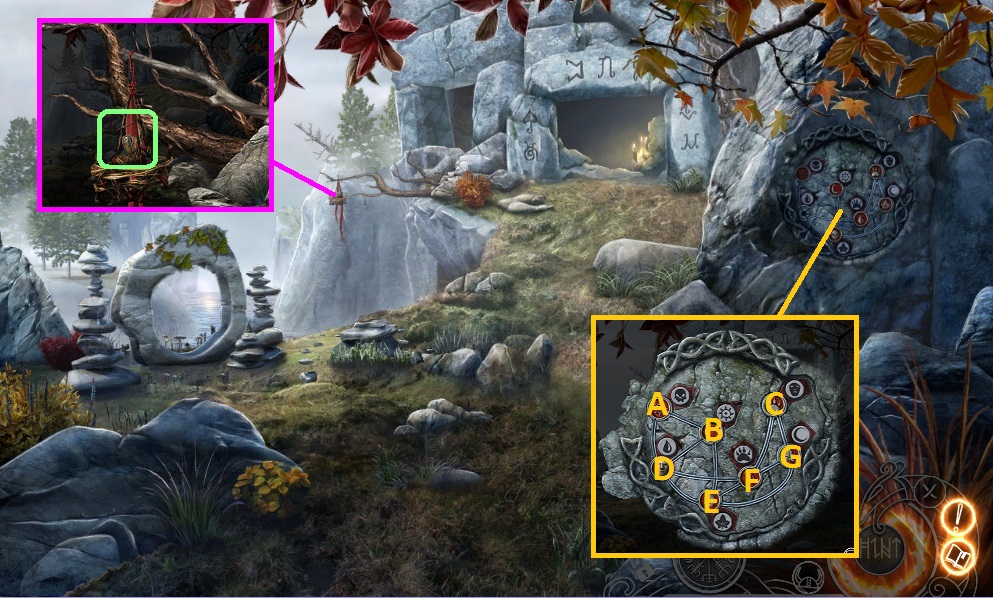
- Select the crude staff to collect the mask token & place it to trigger a mini game.
- Solve the game by arranging the tokens & symbols correctly.
- Solution: b-e, a-b, d-f, e-g, f-c
- Collect the seer stone.
- Move to the Desolate Chamber.
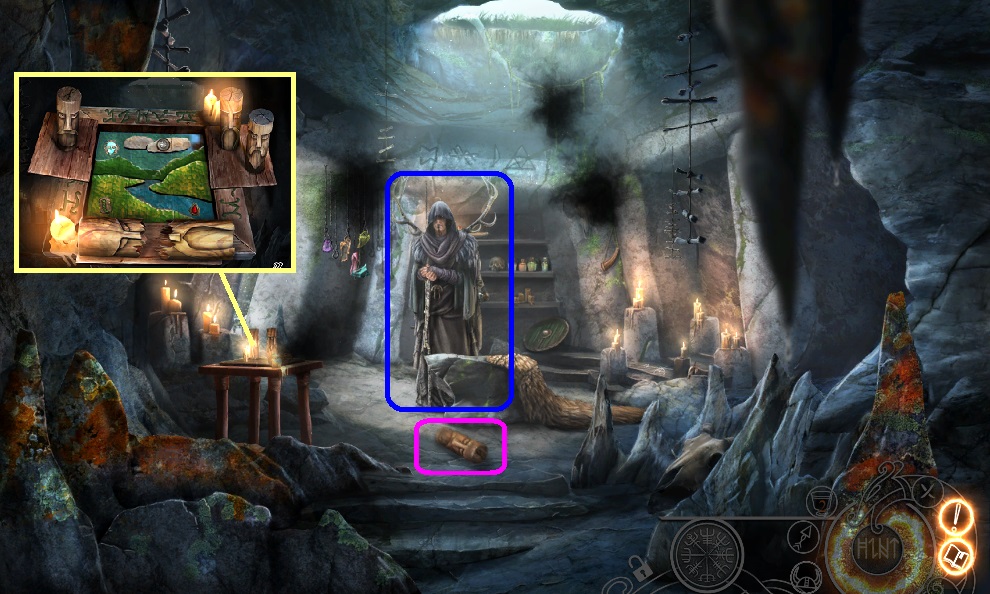
- Place the seer stone onto the crude staff – give the seer staff to the Seer.
- Collect the wooden figurine & place it onto the table.
- Place the gems correctly.
- Collect the rough crystal.
- Move down once.
- Place the rough crystal to trigger a mini game.
- Solve the game by using the arrows to align the outlines correctly.
- Collect the crystal.
- Move into the Desolate Chamber.
- Place the crystal to trigger a mini game.
- Solve the game by arranging the crystals correctly to fill the shadow on the wall.
- Click the skald area on the map & move into the Cavern.
- Collect the stone chunk.
- Click the hand – collect the broken lyre.
- Select the pin to collect the leather wrist guard & attach it to the stone chunk.
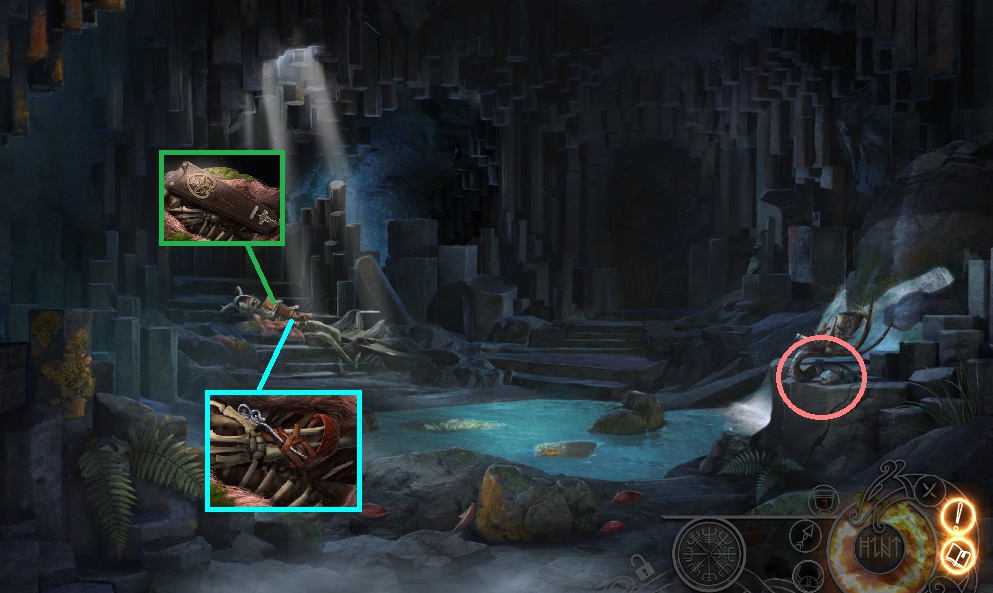
- Move down once.
- Select the sling to collect the sturdy bone & bird skull.
- Move into the Cavern.
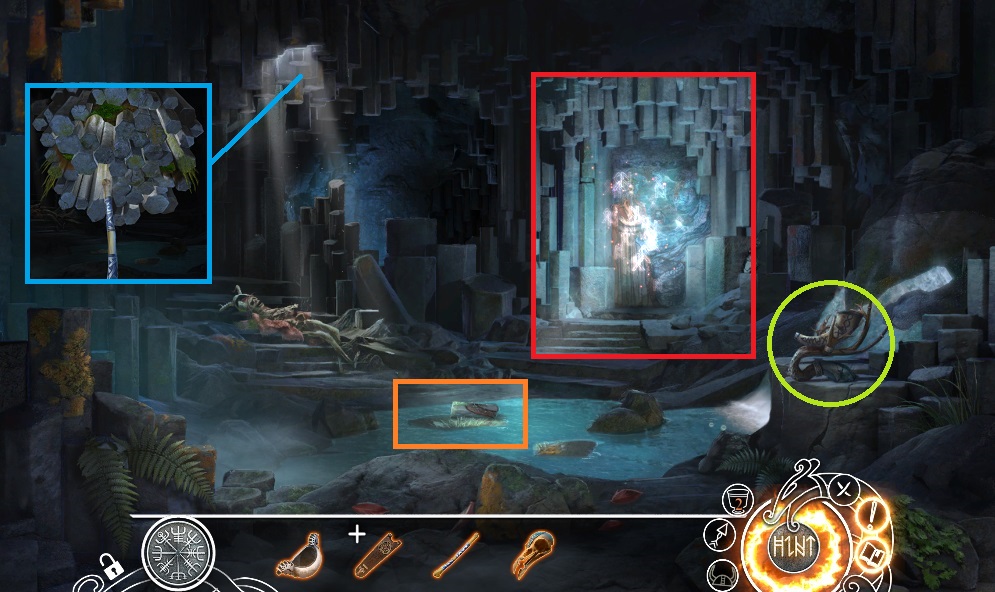
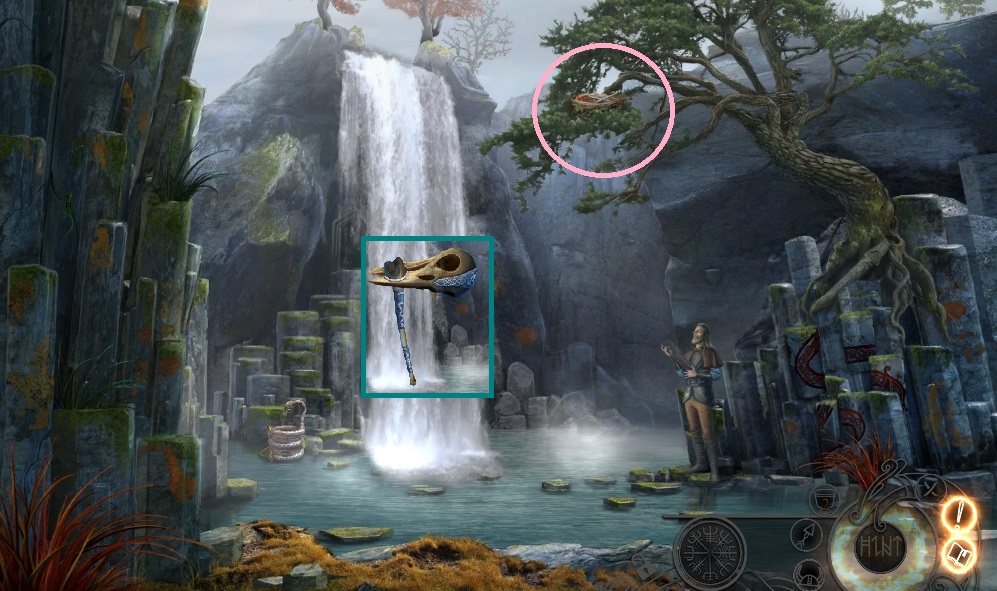
- Select the bird skull to collect the decorated horn.
- Select the sturdy bone to collect the basalt stick.
- Click the hidden objects area
- Find the items.
- Collect the lyre column.
- Move down once.
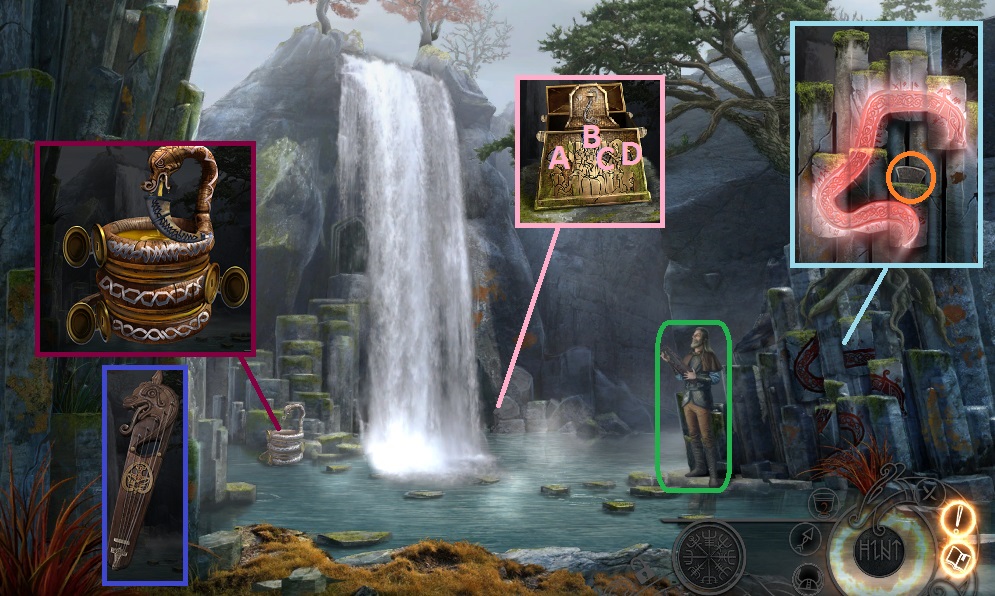
- Select the decorated horn to trigger a mini game.
- Solve the mini game by arranging the barrels of the horn to match the patterns on the snake.
- Collect the mead.
- Place the basalt stick – align the snake; collect the ornamented comb.
- Give Mead to the man.
- Place the ornamented comb.
- Click the inserts – collect the strings and place it along with the lyre column onto the broken lyre.
- Arrange the strings.
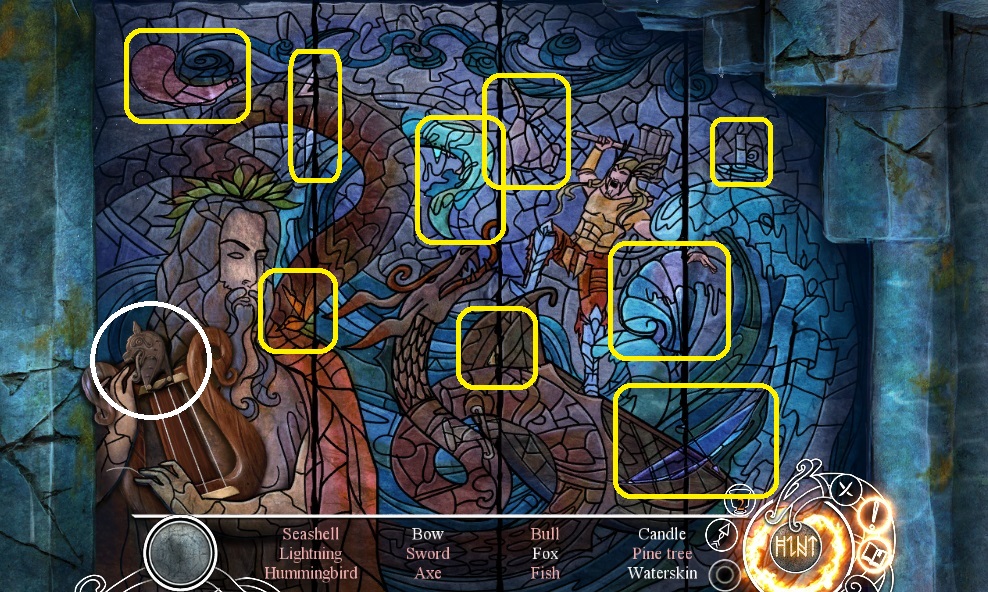
- Give the lyre to man –play the hidden objects area.
- Find the items.
- Click the scene.
General Tips & Information
Chapter 1 Enter the Forest
Chapter 2 The Sandfell
Chapter 3 Lower
Chapter 4 Jotuneim
Chapter 5 The Altar
Chapter 6 The Harbor
Ask for help in the comments below!
Chapter 1 Enter the Forest
Chapter 2 The Sandfell
Chapter 3 Lower
Chapter 4 Jotuneim
Chapter 5 The Altar
Chapter 6 The Harbor
Ask for help in the comments below!