
Dark Tales: Edgar Allan Poe's The Fall of the House of Usher: Chapter Four: Cemetery Grounds
Our Dark Tales: Edgar Allan Poe's The Fall of the House of Usher Walkthrough is the perfect companion for the ever vigilant detective as you once again join your friend Dupin in a strange and dangerous new investigation. As this new case draws you deeper into its murky circumstances, you'll be glad you have our detailed notes, step-by-step instructions, custom screenshots, and puzzle solutions to help you solve the case of the Usher Twins and the missing townspeople.

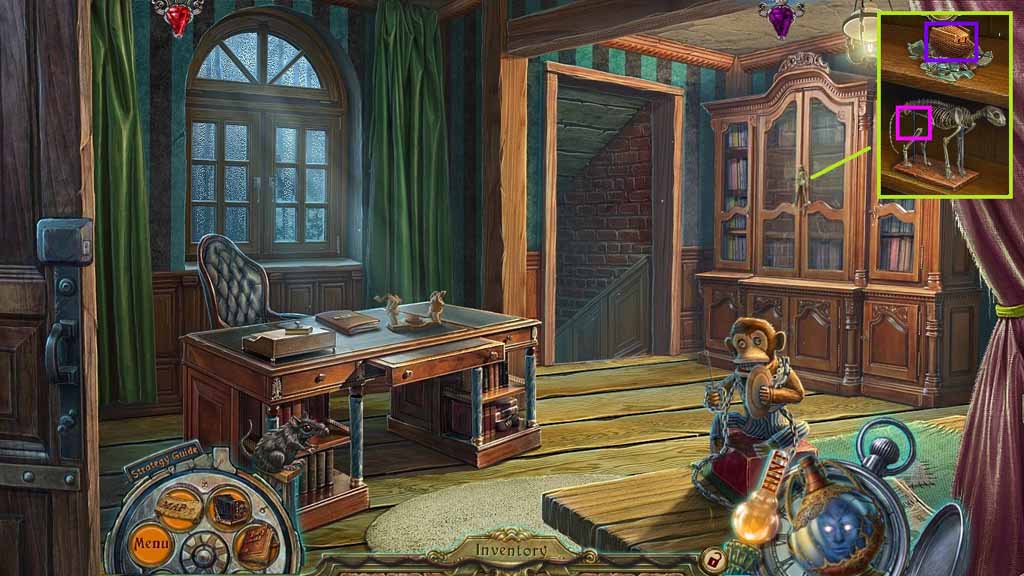
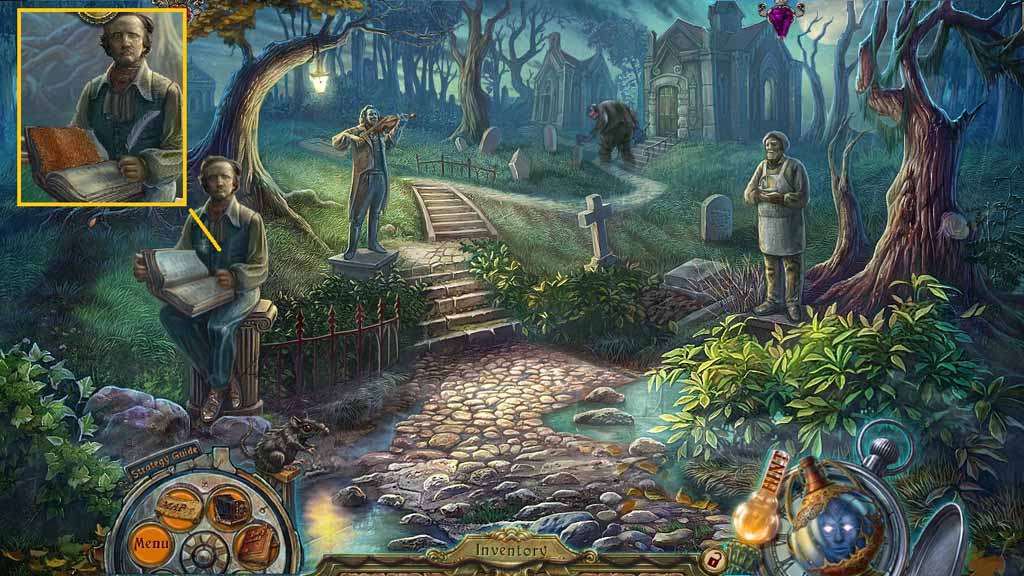
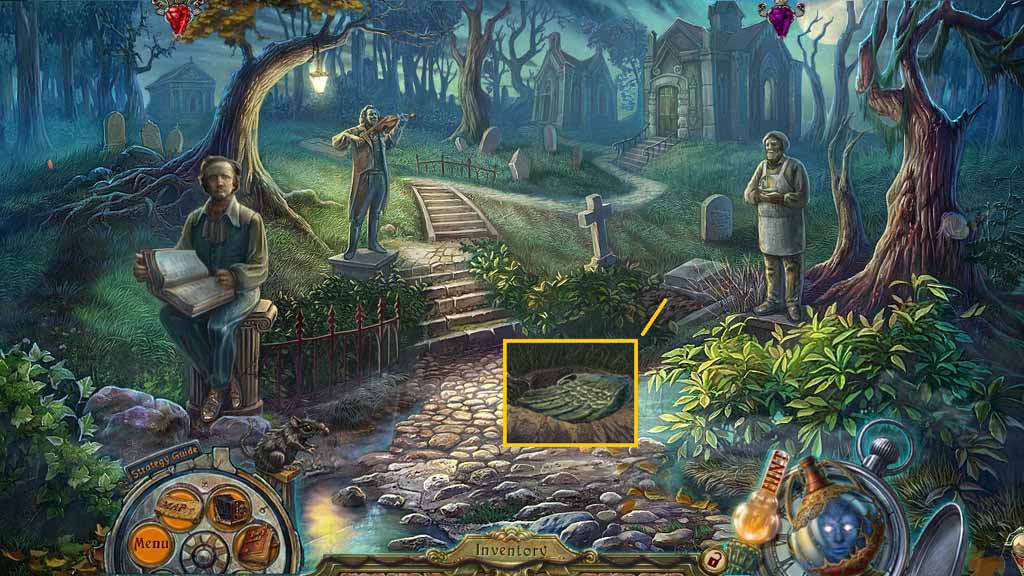
- Collect the snake fragment.
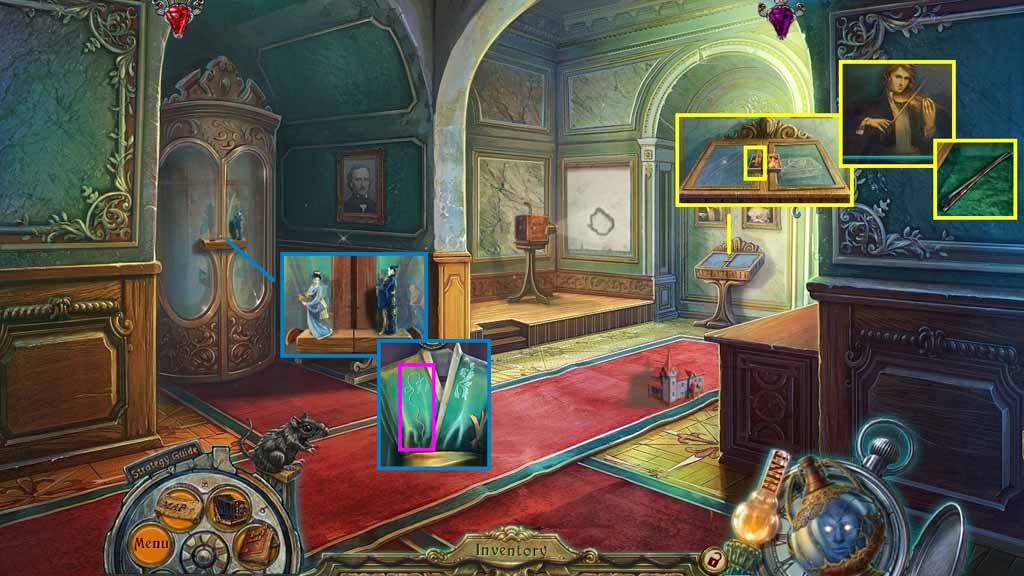
- Select the Reborn One to use on the statue.
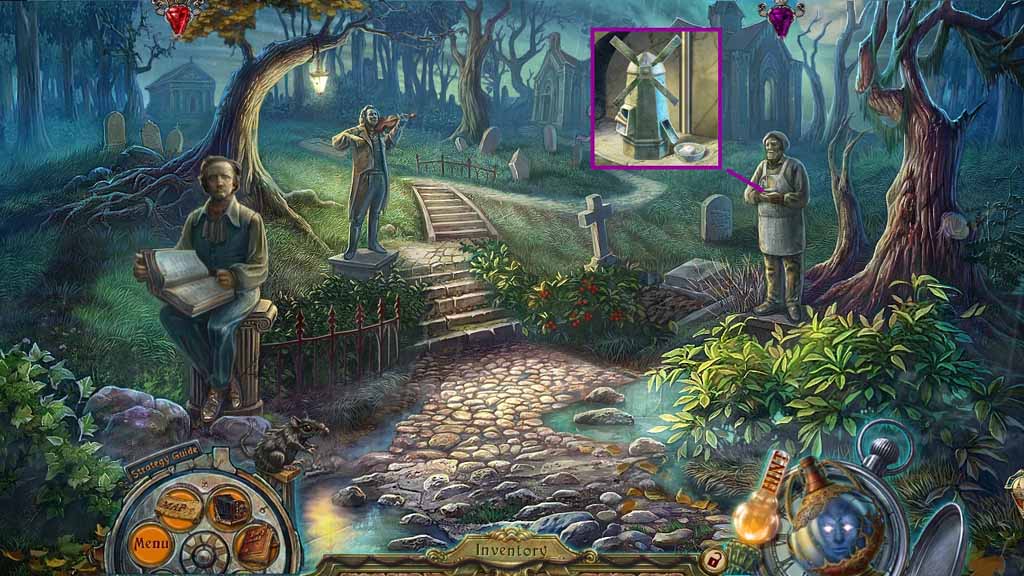
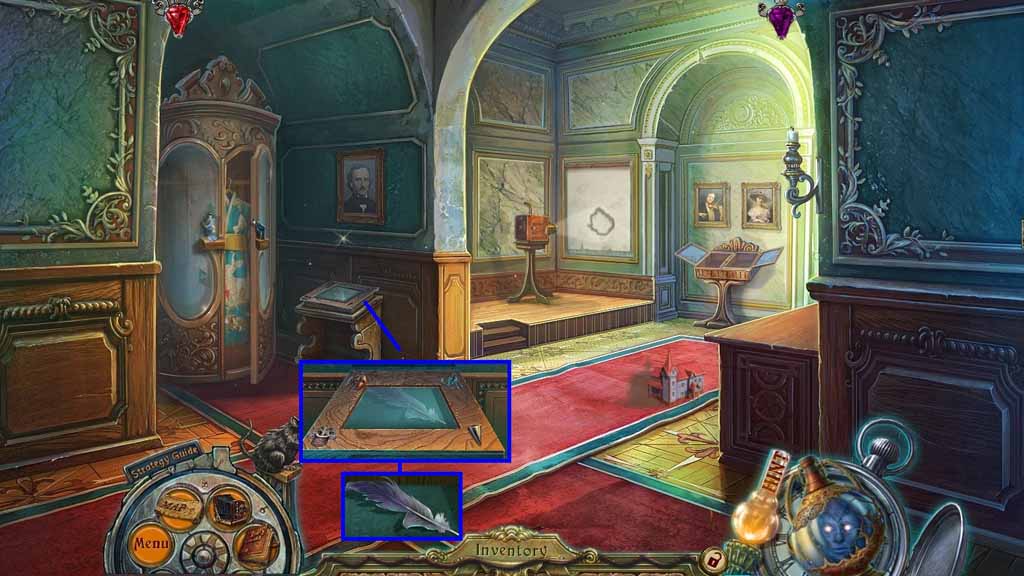
- Collect the photograph.
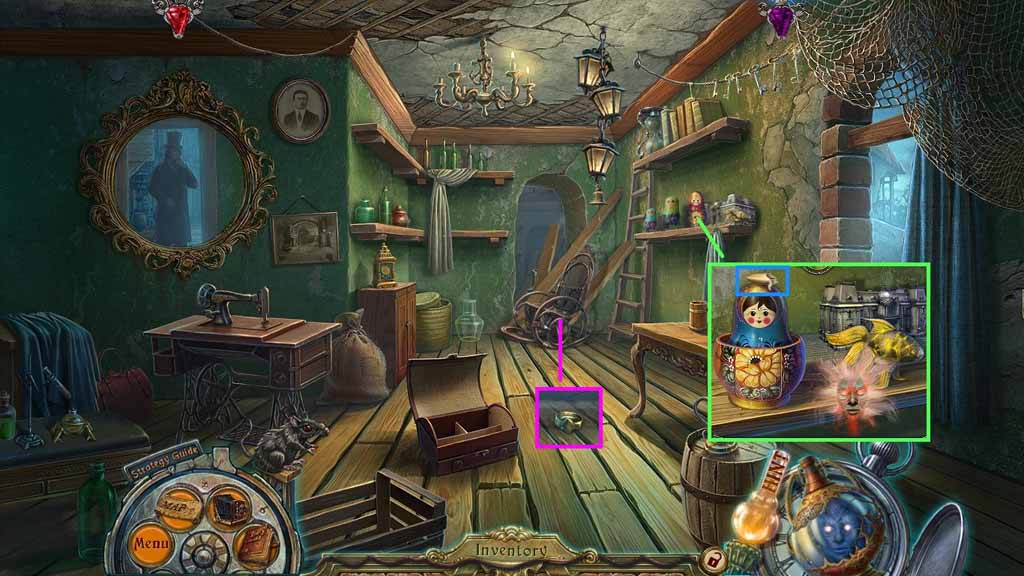
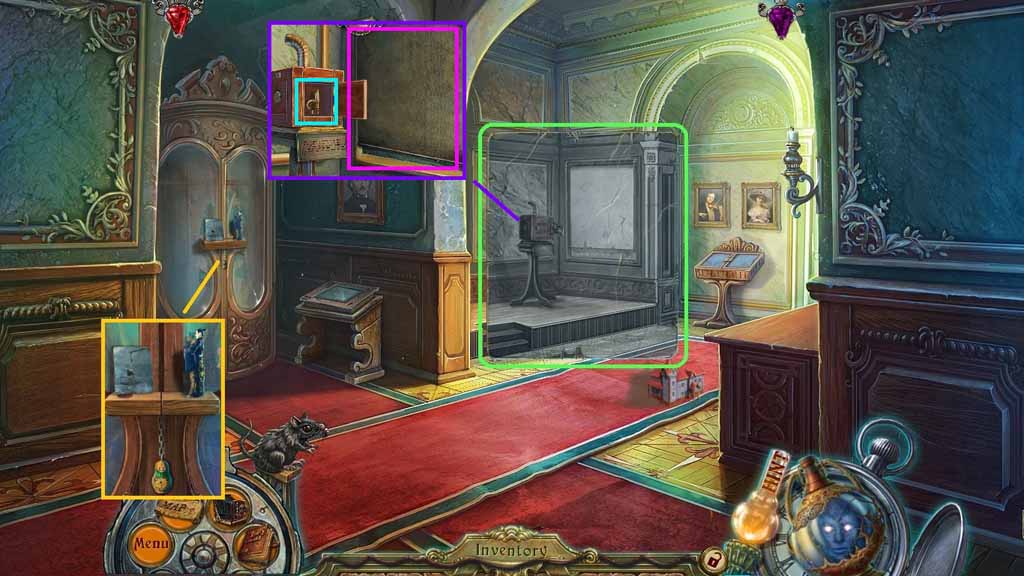
- Select the knife to collect the long ivy branch.
- Collect the violin medallion.
- Move to the Clockmaker’s Shop.
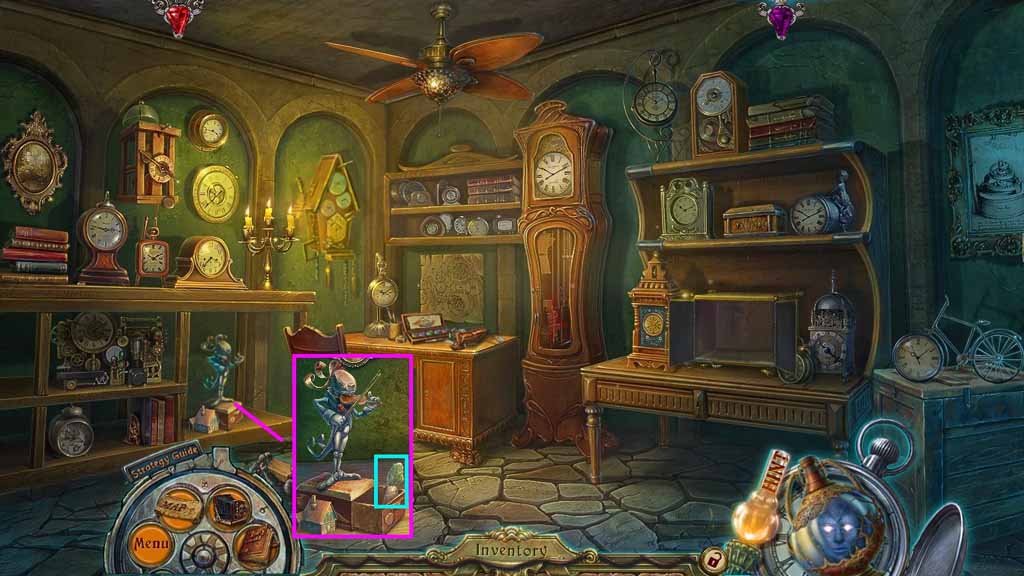
- Place the violin medallion onto the bunny.
- Collect the stone medallion.
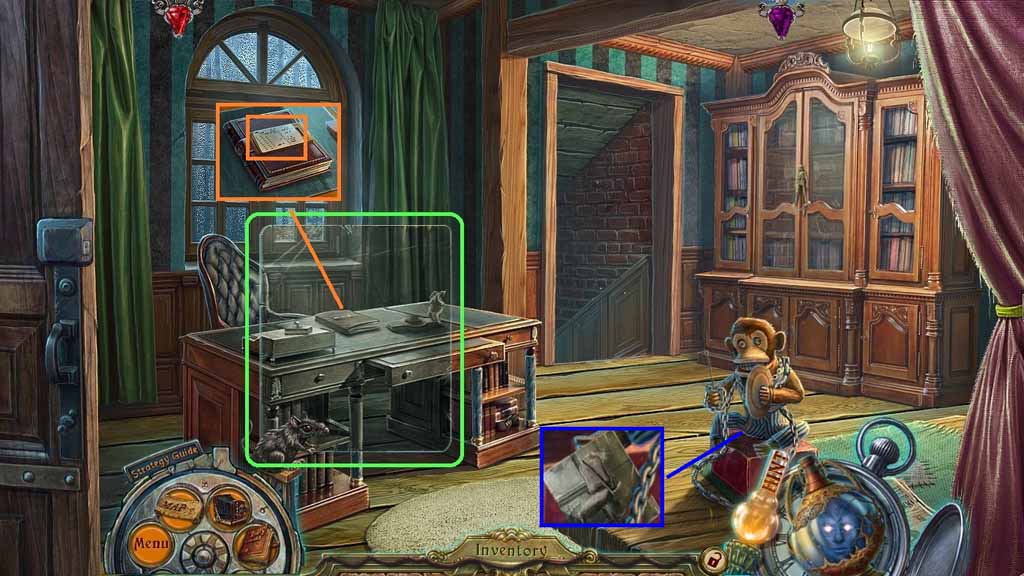
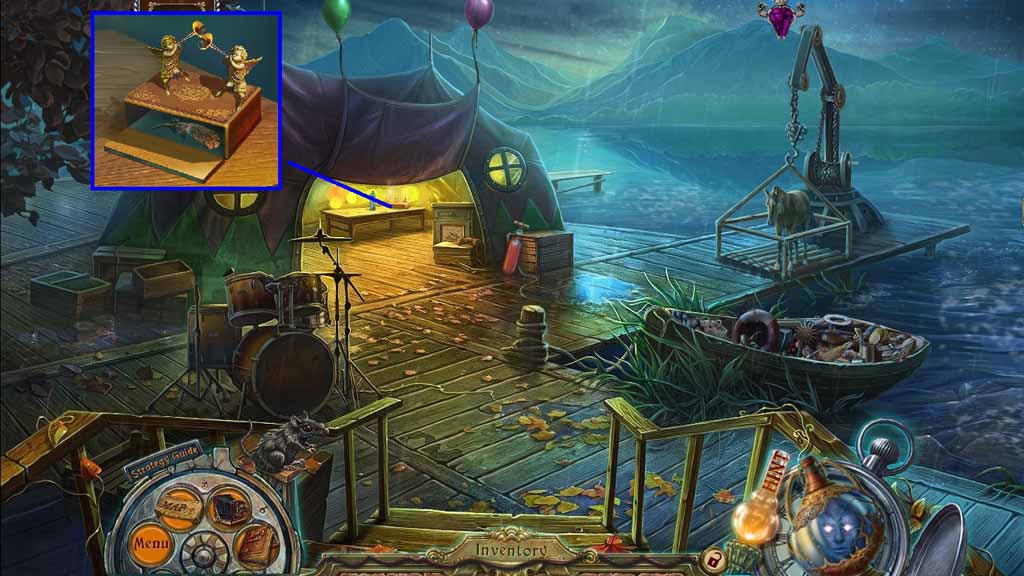
- Move down 2 times and click the puppet stand to trigger a mini game.
- Place the items where they belong.
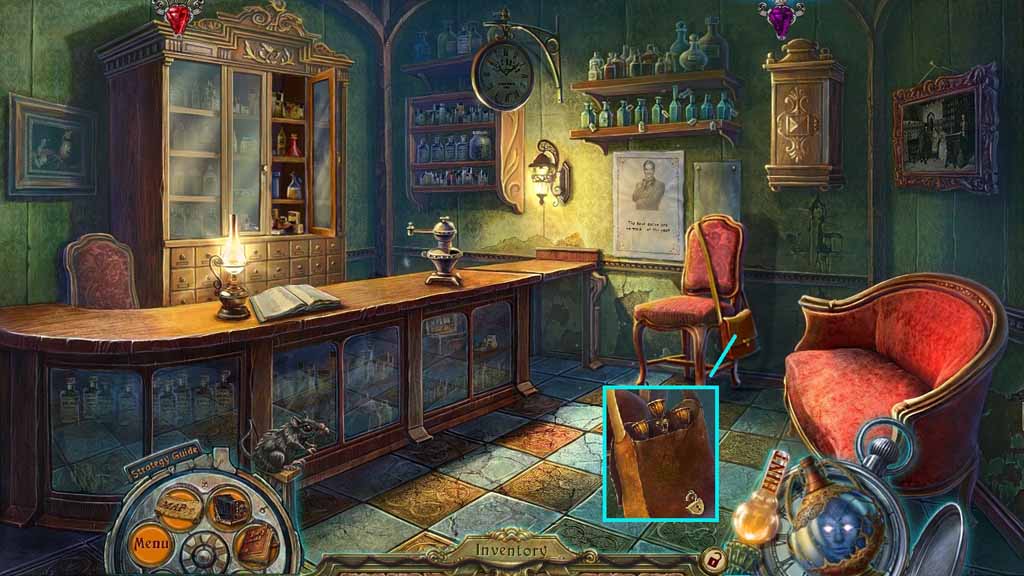
- Collect the syringe.
- Move ahead.

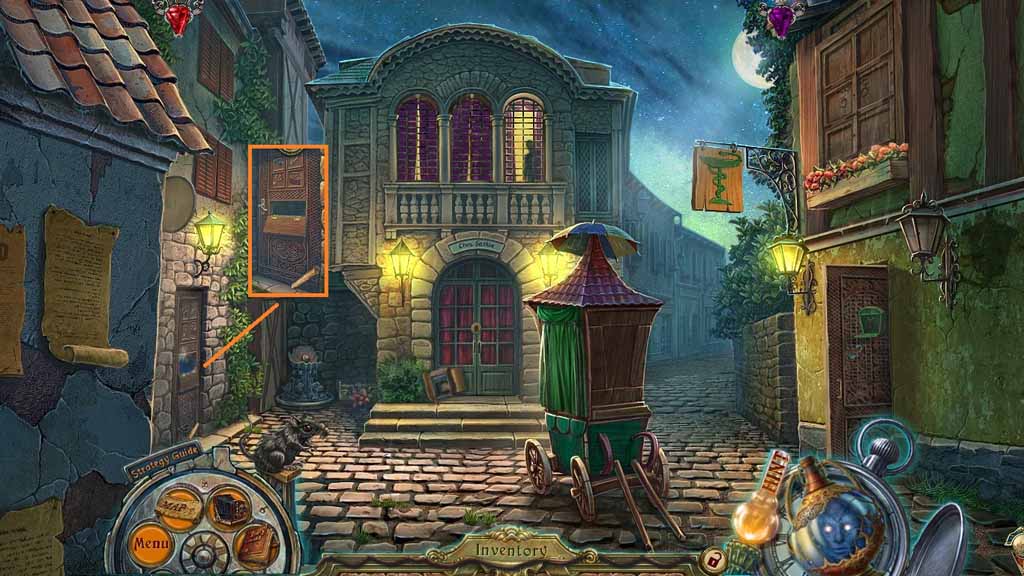
- Place the syringe into the door and move to the left.
- Place the photo onto the scene.
- Collect the perforated card.
- Collect the photograph.
- Move ahead.
- Collect the red mask and the bowl.
- Select the perforated card to place onto the tablet.
- Move down 2 times and move ahead.
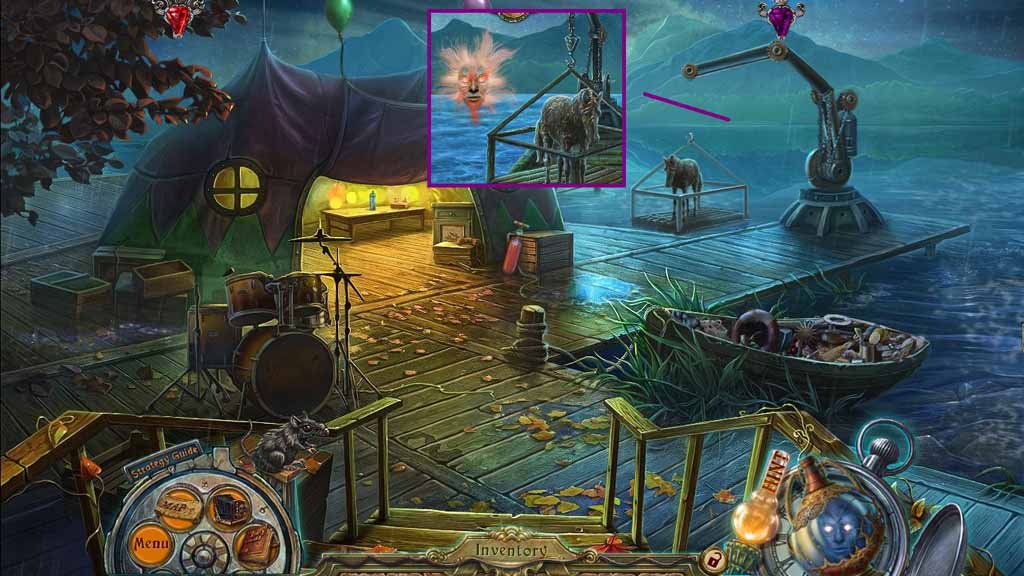
- Place the stone carrot onto the string.
- Collect the 1st toy ship’s mast.
- Move down 2 times.
- Place the snake fragment and the bowl onto the handle.
- Collect the small bear.
- Move ahead and go left.
- Click the dials to match the code.
- Place the small bear next to the egg.
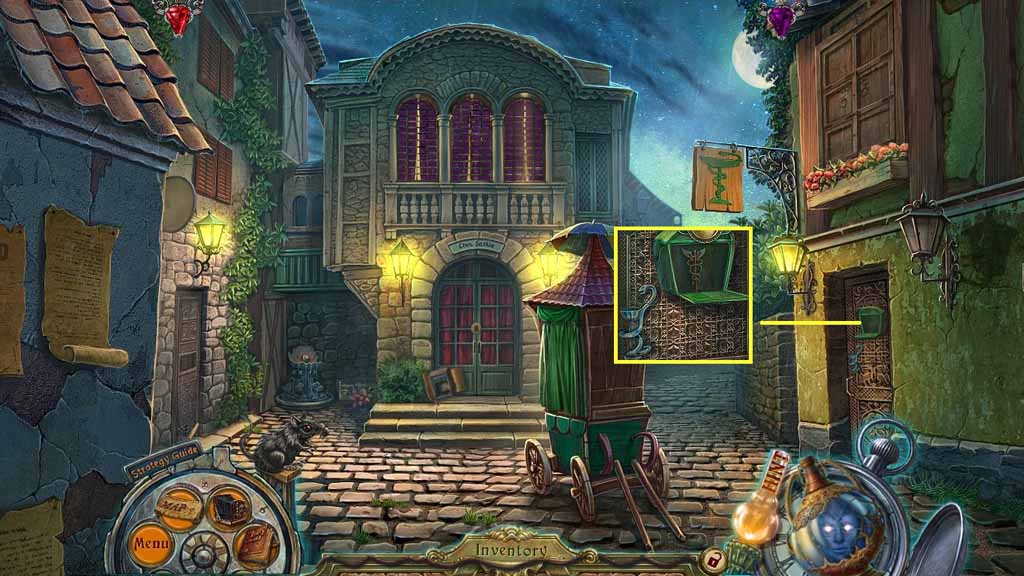
- Collect the scroll, the glasses and the caduceus.
- Move down 2 times.
- Insert the caduceus into the door.
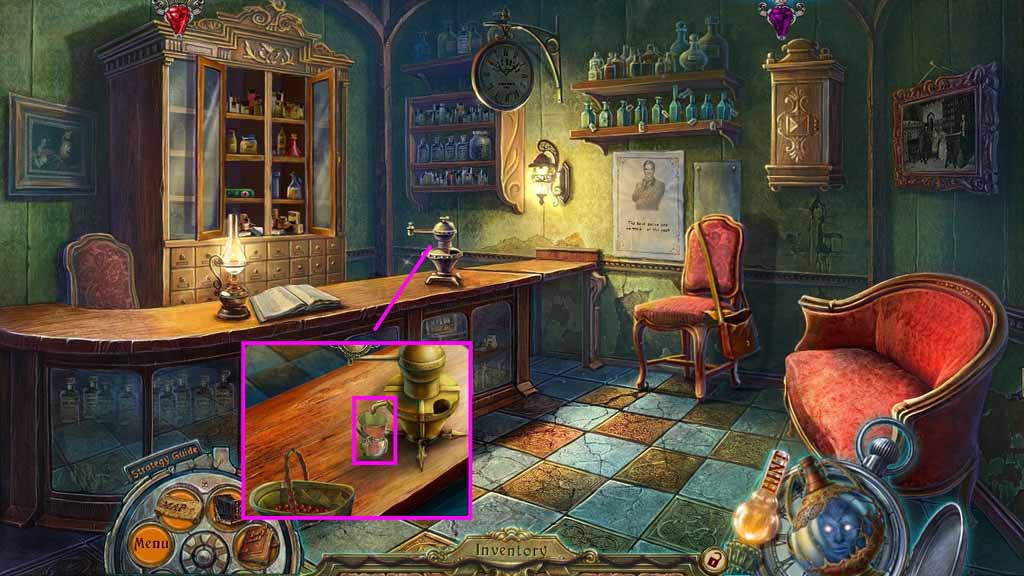
- Move into the Pharmacy.

- Select the photo to use on the scene.
- Collect the mechanical spider.
- Collect the skull pendant.
- Move to the Basement.
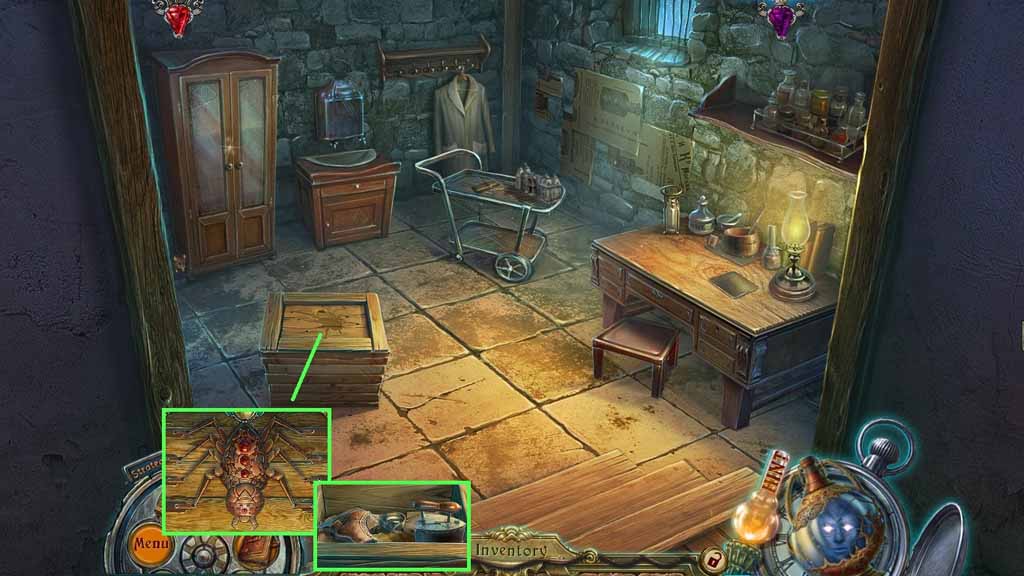
- Place the mechanical spider onto the crate and click the spider to trigger a mini game.
- Solve the game by repeating the sequence of the spider legs and the crate will open.
- Click the items aside; collect the pharmacist’s ring, the skate and the iron.
- Move to the Pharmacy.
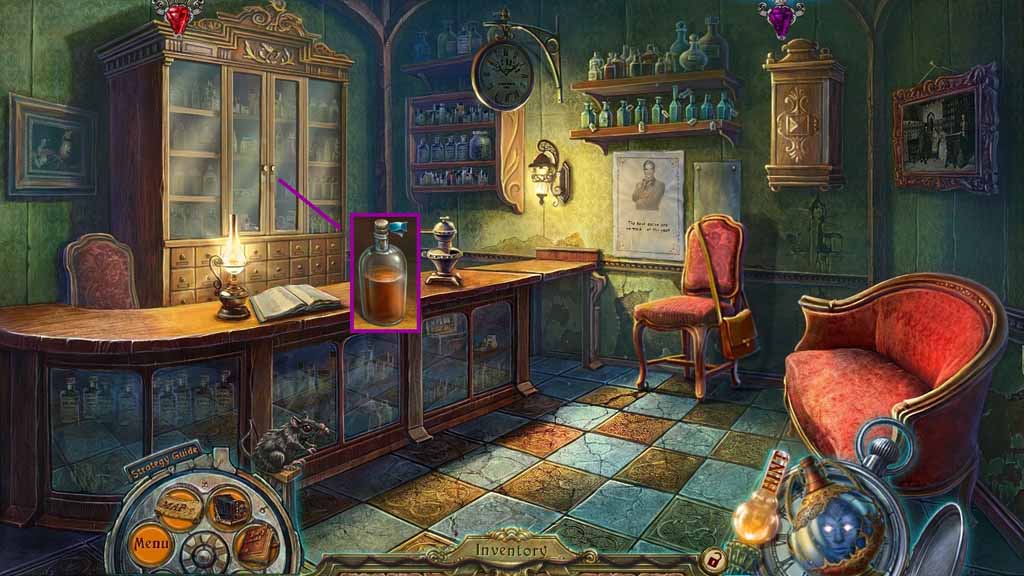
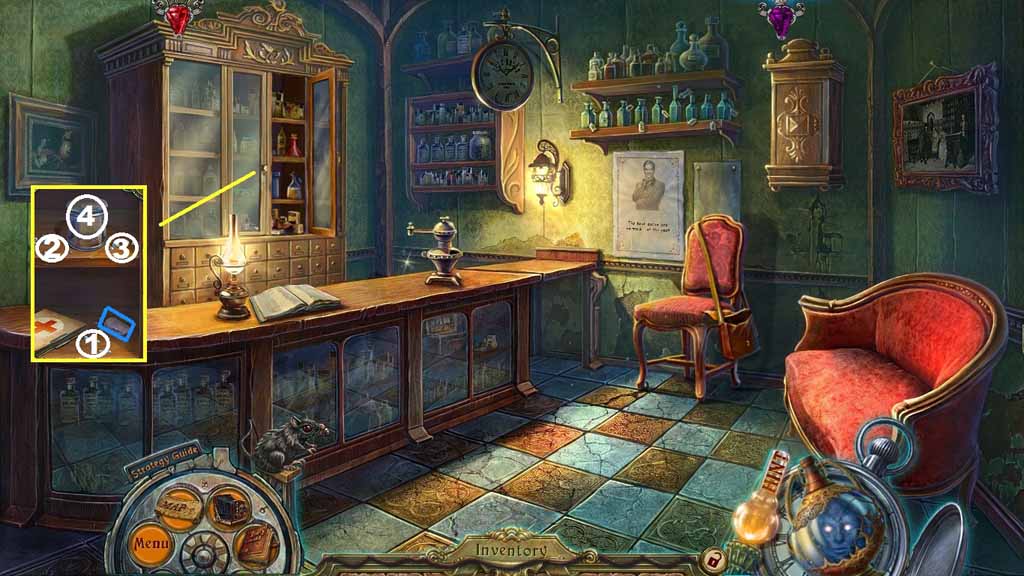
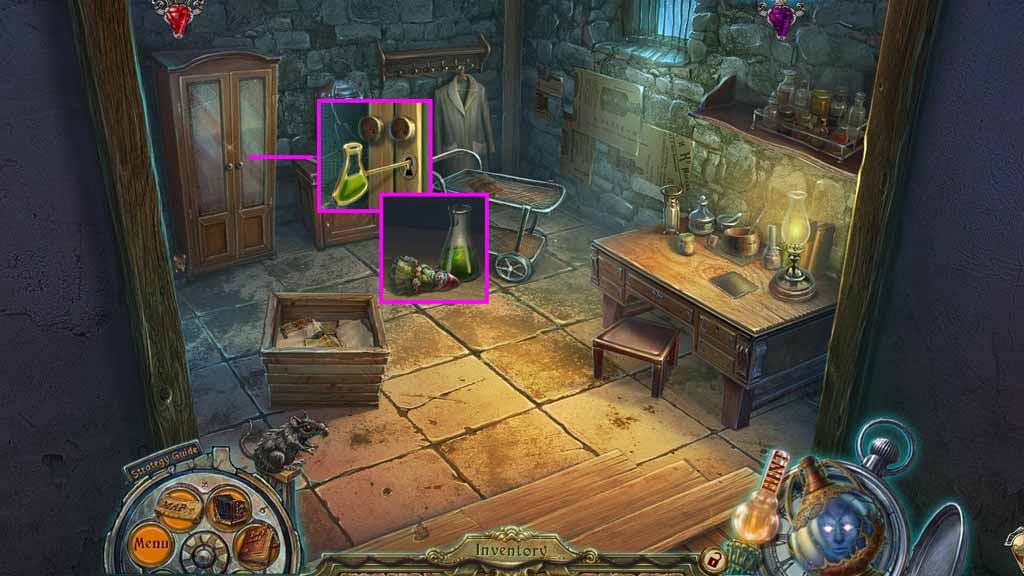
- Select the pharmacist’s ring to use on the right door of the cabinet.
- Collect the castor oil
- Move to the Basement.
- Select the castor oil to use on the wallet; click it once.
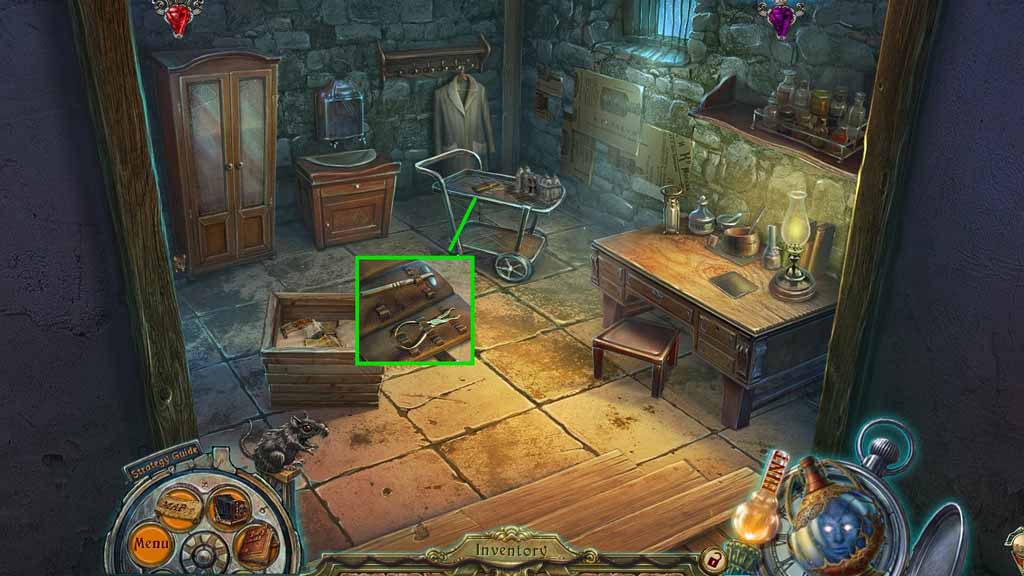
- Collect the reflex hammer and the medical nippers.
- Move down once.
- Insert the skull pendant into the door.
- Click the arms and legs to fit into the groove correctly.
- Select the medical nippers to collect the bone.
- Select the reflex hammer to smash the bottle; collect the toy ship’s hull.
- Move down and move ahead once.
- Place the bone into the mill and click the blades.
- Collect the bone flour.
- Move to the Pharmacy.
- Select the nippers to cut the lock.
- Collect the candelabra.
- Move down once.
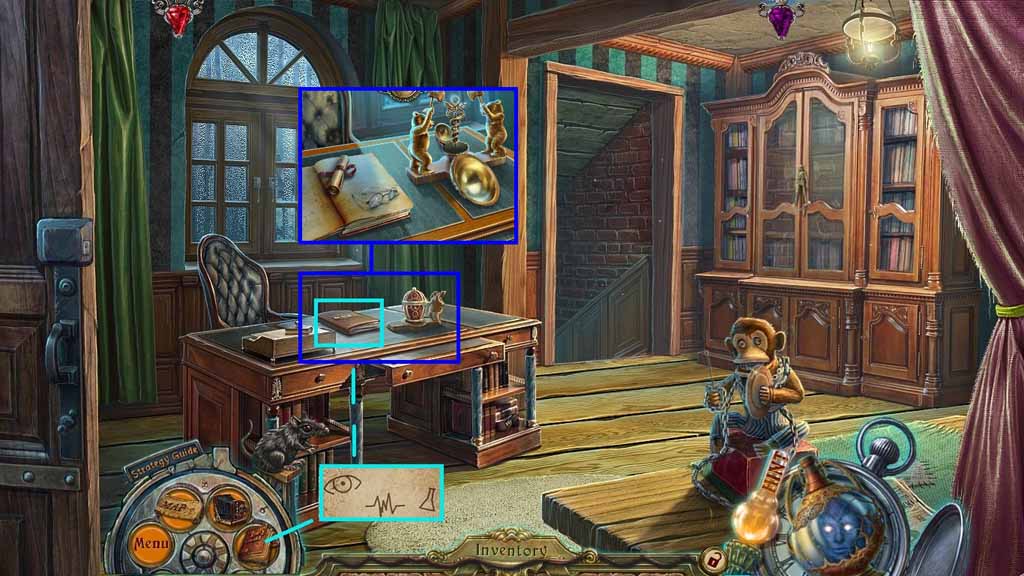
- Read the note and click the panel.
- Insert the glasses, the iron, the skate and the candelabra into the door.
- Move to the left into the Tailor’s.
- Click the doll.
- Collect the burned out candle.
- Select the Reborn One to use on the fish; collect the gourami fish.
- Click the debris from the door; collect the ring with a symbol.
- Move ahead.
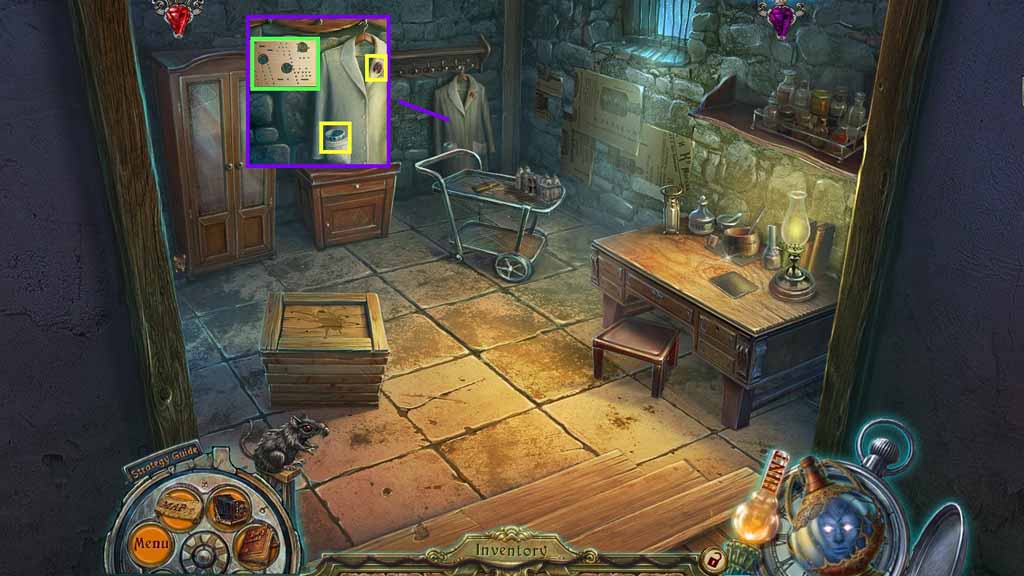
- Hang up the clothes.
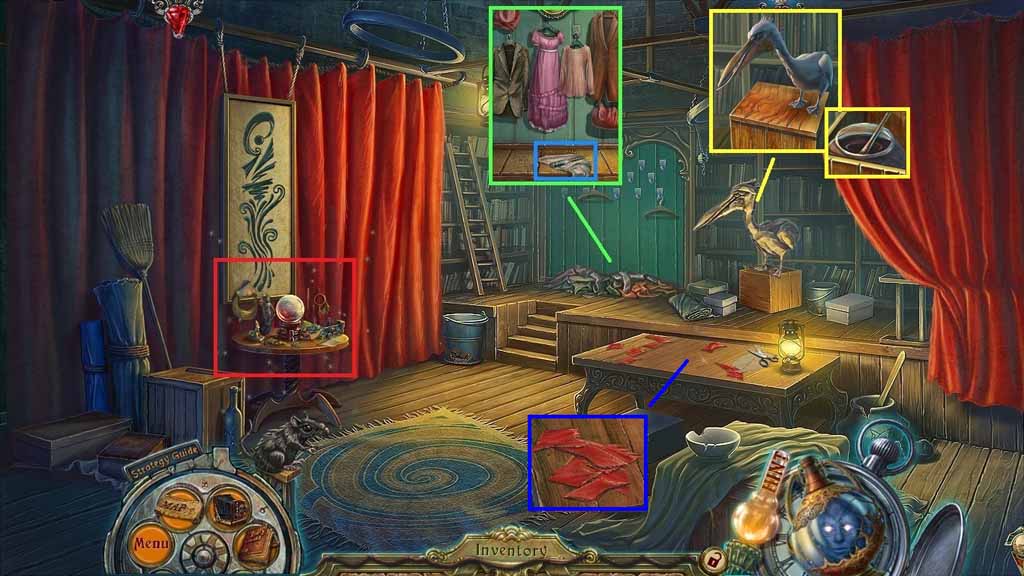
- Click the cloth; collect the chisel and the white cloth.
- Select the Reborn One and use it on the pelican.
- Give the pelican the gourami fish.
- Click the box; collect the jar of tar.
- Collect the pieces and collect the rags.
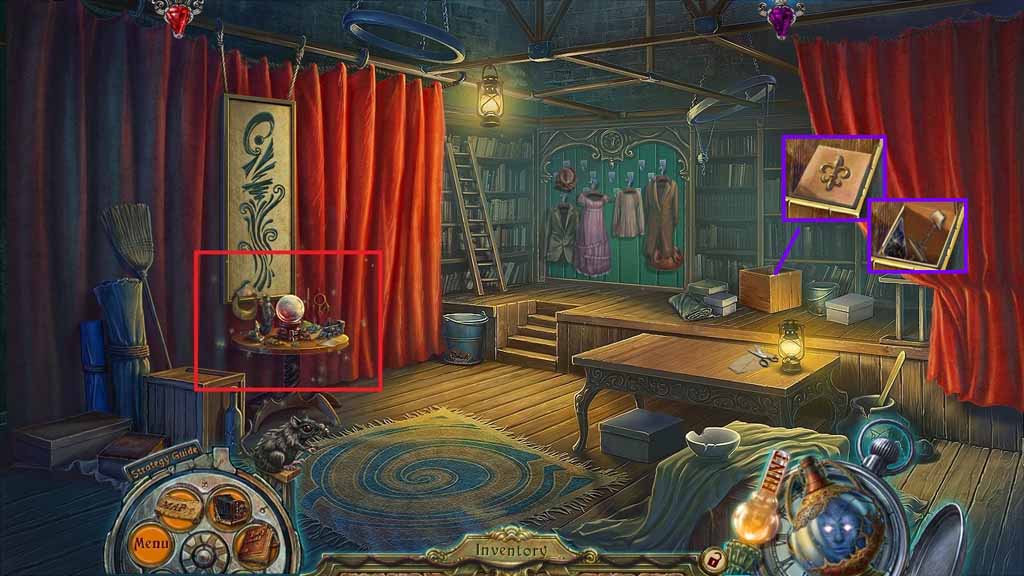
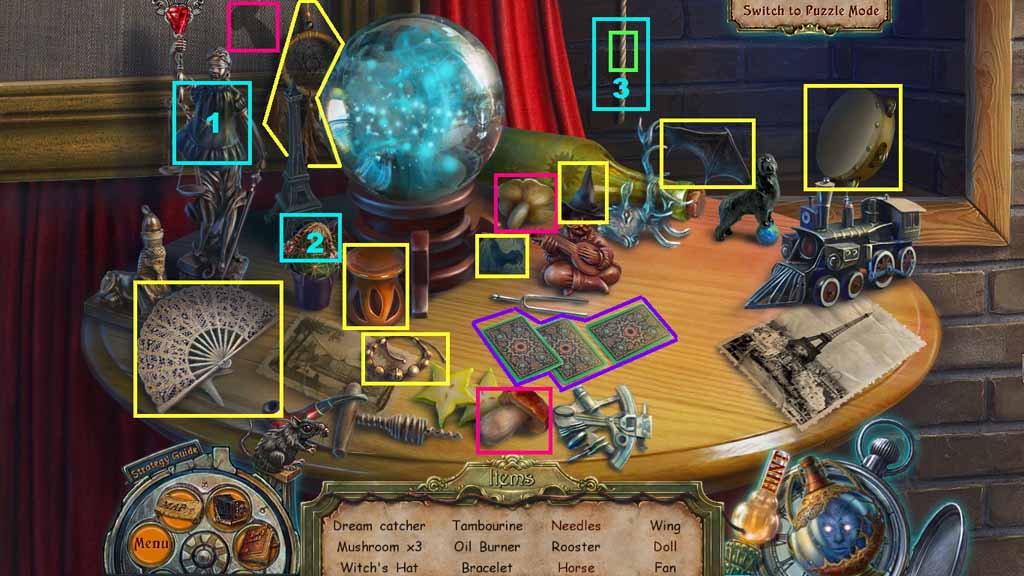
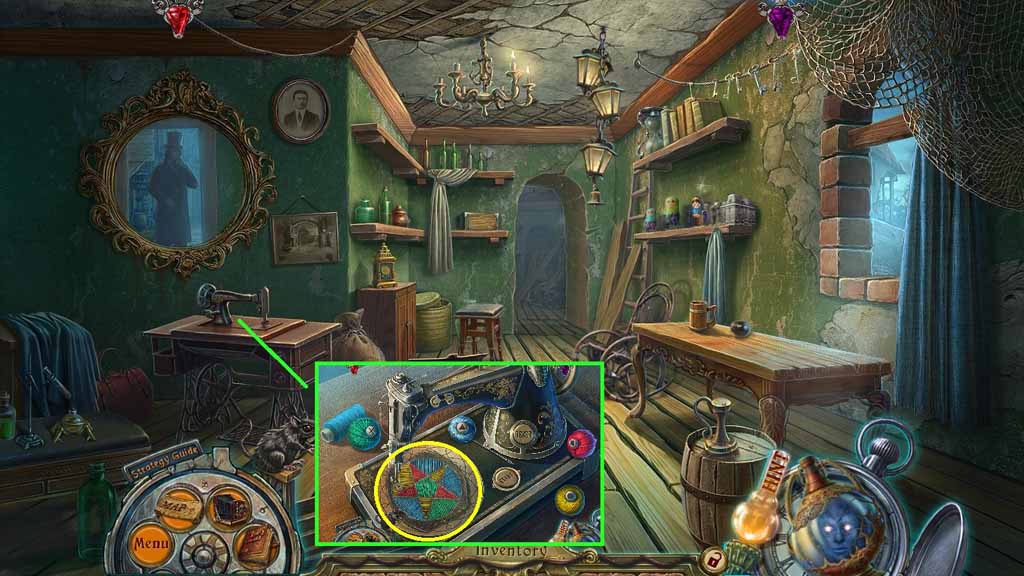
- Click the table to trigger a hidden objects area.
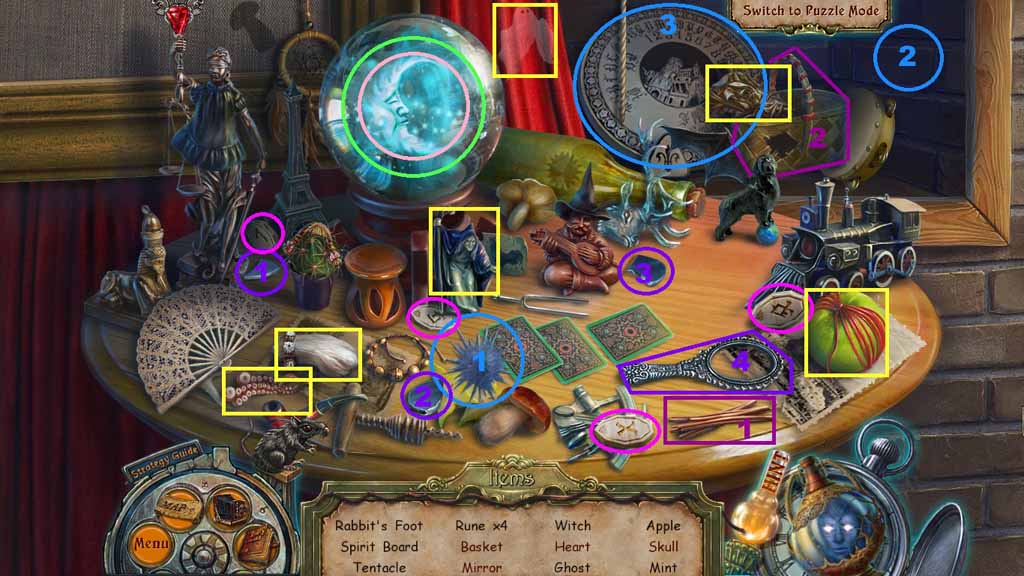
- Find the listed items.
- Click the curtain and insert the splatter; collect the spirit board.
- Select the fibers and use them to mend and collect the basket.
- Collect the shards and place them into the frame; collect the mirror.
- Click the crystal ball once; collect the heart.
- Click the crystal ball again; collect the skull.
- Collect the basket.
- Move down once.
- Collect 1 / 2 lilies.
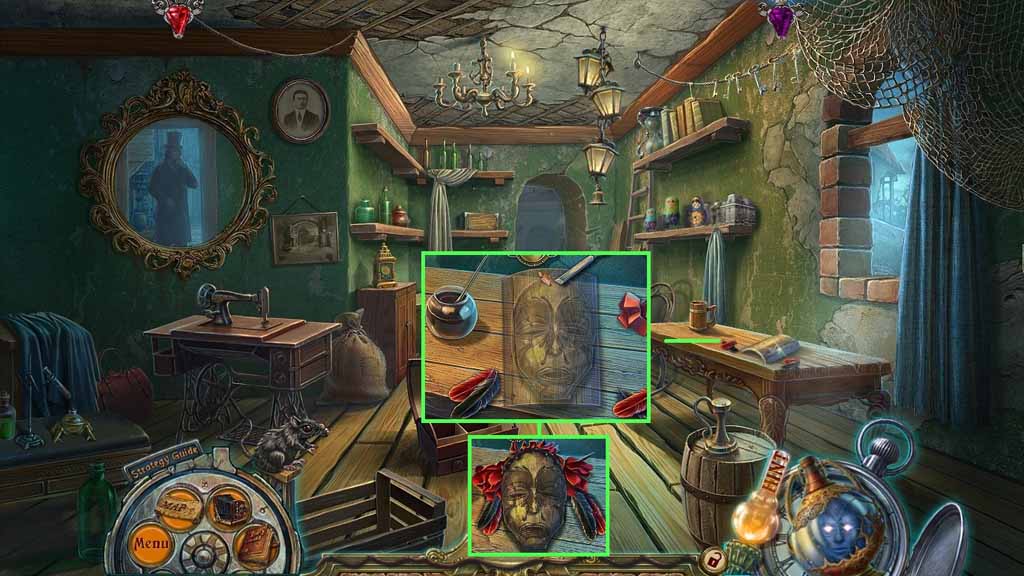
- Place down the jar of tar, the chisel and the rags onto the table.
- Select the chisel to use on the wood.
- Pour the tar onto the wood, then place down the rags and the feathers.
- Collect the mask and the photograph beneath it.
- Move down once.
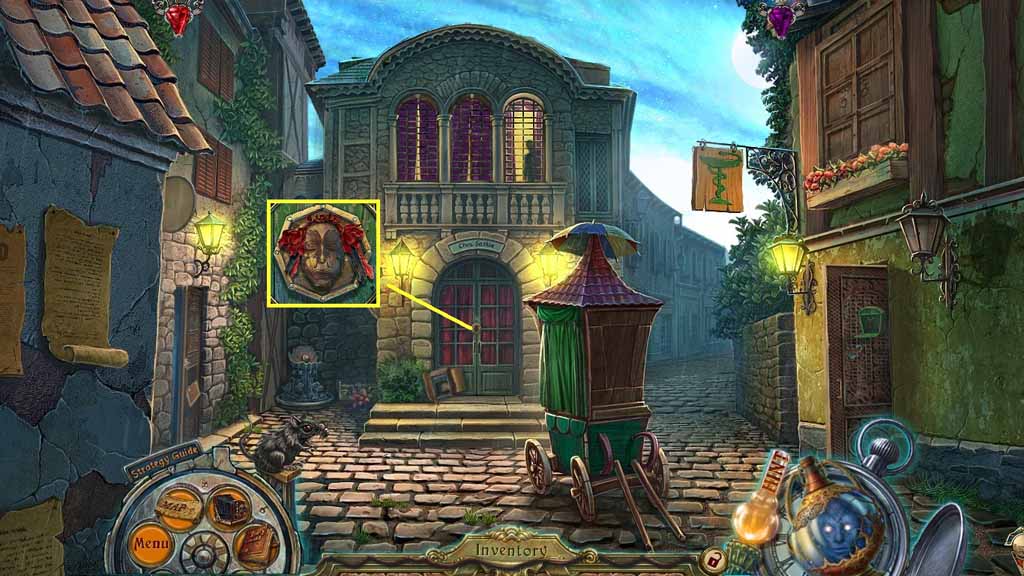
- Place the mask onto the lock.
- Move into the Museum.
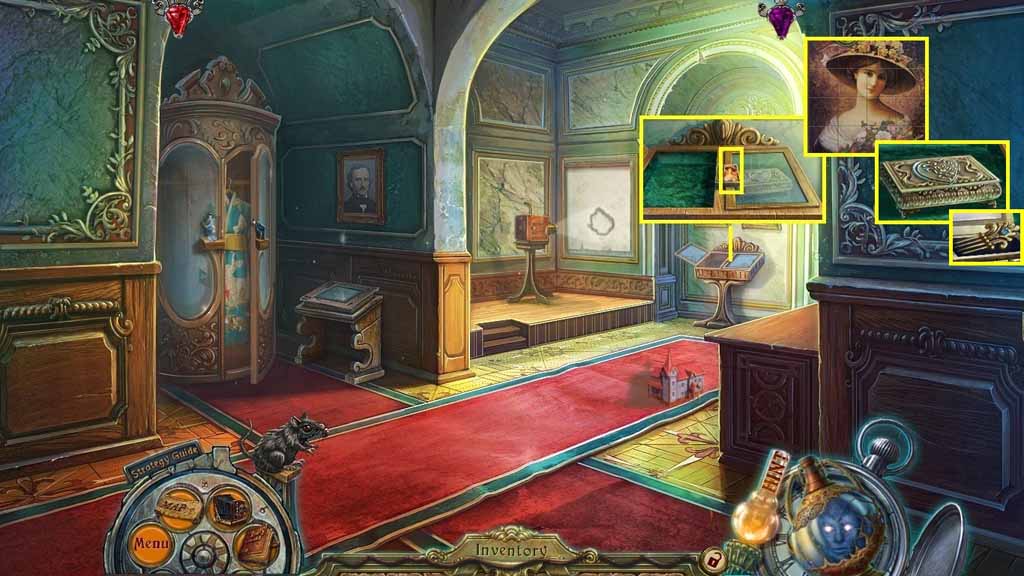
- Place the photograph onto the scene.
- Collect the photograph and the matryoshka doll.
- Click the camera open; collect 2 / 2 lilies.
- Hang the white cloth onto the wall.
- Move to the Pharmacy.
- Place the ring with a symbol into the door on the left.
- Collect the chalk.
- Click the jar lid.
- Collect the 3 sets of grains and place them into the jar; collect the jar of salt.
- Move down and to the left.
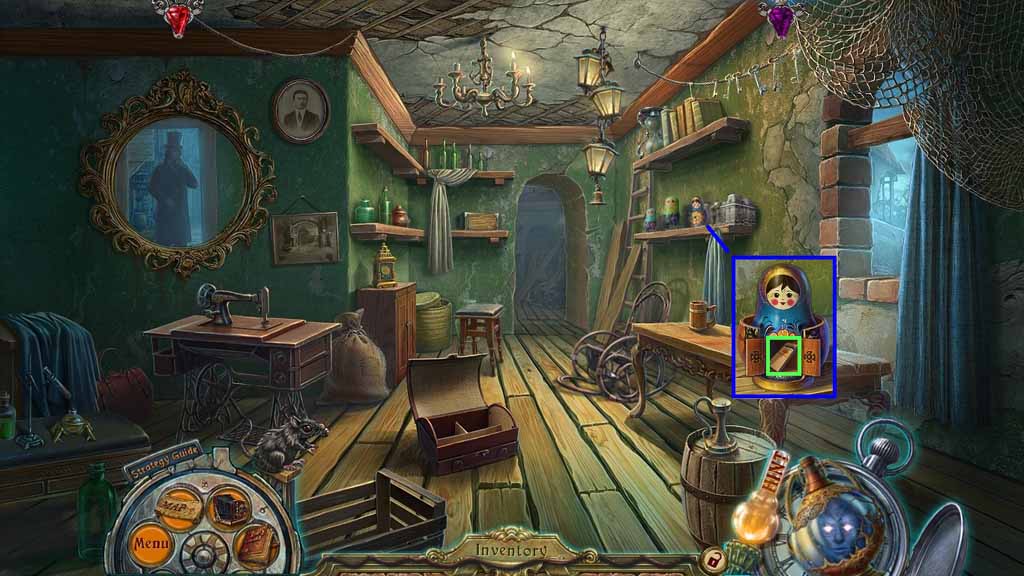
- Click the bottom half of the doll and insert the matryoshka doll inside.
- Collect the matches.
- Move ahead.
- Place the 2 lily pieces into the box and click it once.
- Collect the slides with images and the 2nd toy ship mast.
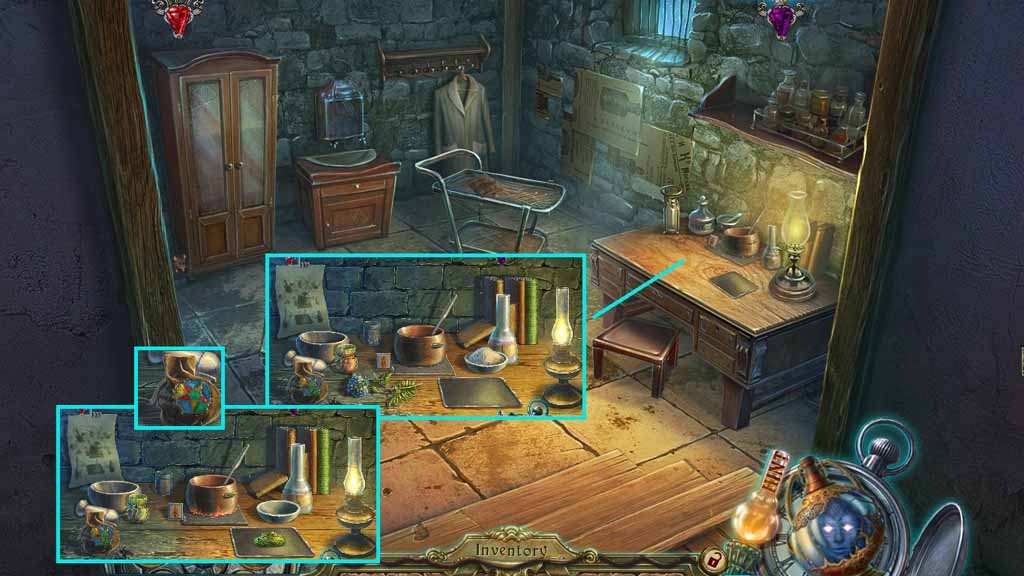
- Click the table to trigger a hidden objects area.
- Fin the listed items.
- Click the rope to collect the needles.
- Place the wig and the dress onto the doll; collect the doll.
- Click the tarot cards 4 times to collect the horse.
- Collect the needle.
- Move down 2 times and move into the Museum.
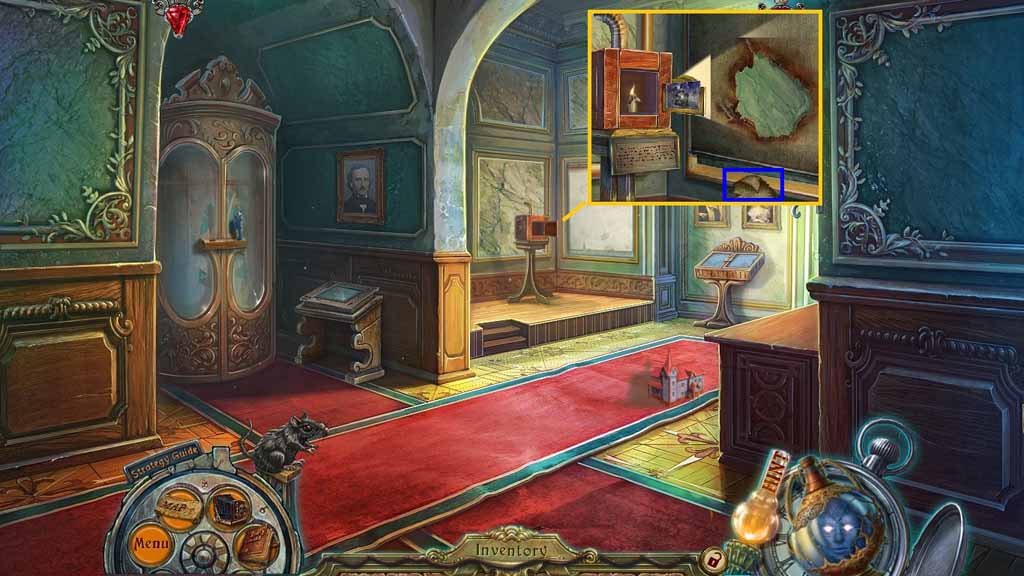
- Place the burned out candle and the matches into the projector.
- Insert the slide with images into the frame; click it once.
- Collect the toy ship’s sail.
- Move to the Clockmaker’s Workshop.
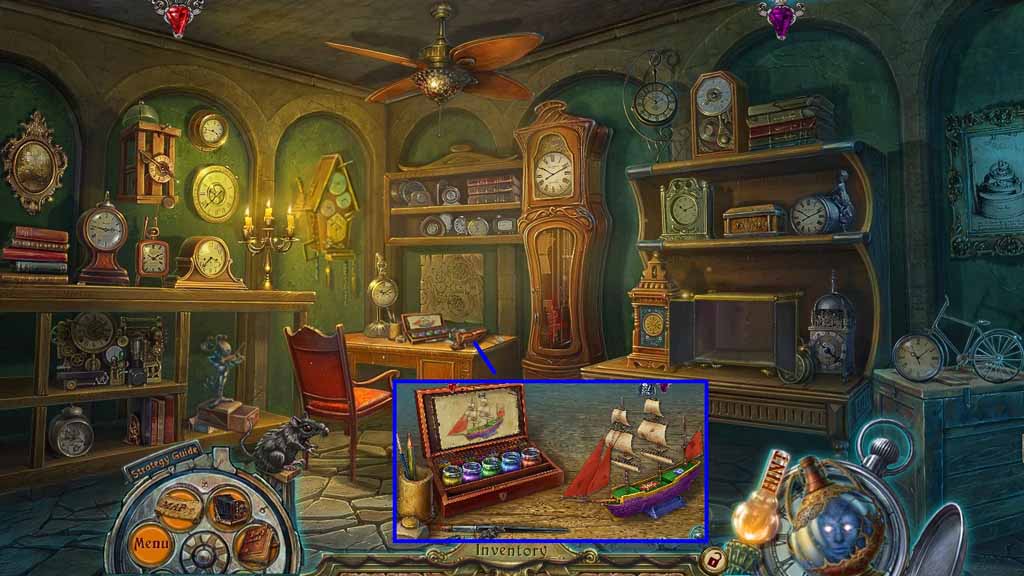
- Zoom into the table and place down the toy ship’s mast, the toy hull, the 2nd toy ship’s mast and the toy ship’s sail to trigger a mini game.
- Solve the game by assembling and painting the ship as shown in the diagram.
- Collect the toy ship.
- Move down and move ahead once.
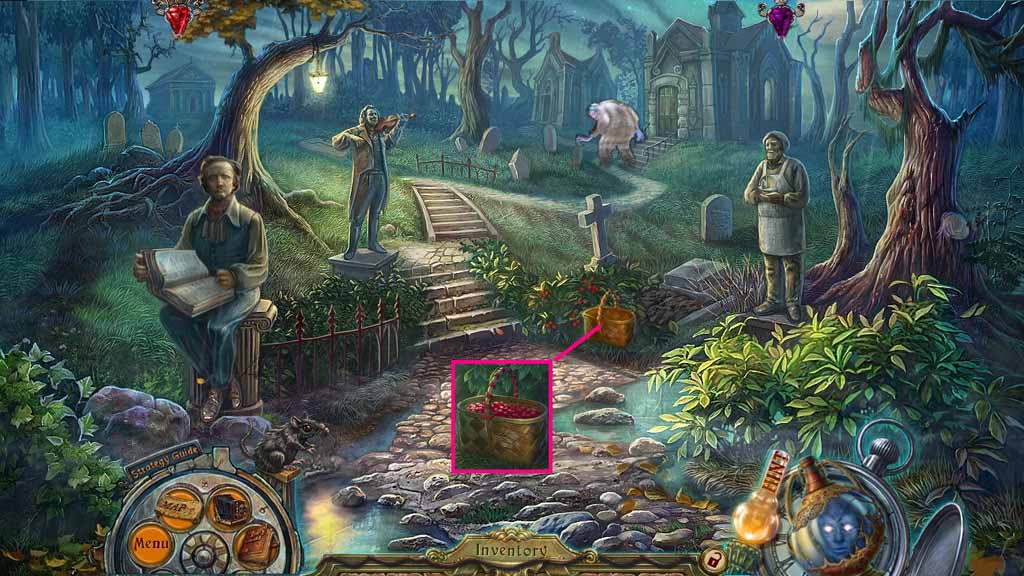
- Place the basket beneath the bush.
- Click the berries; collect the basket of spice berries.
- Move down once.
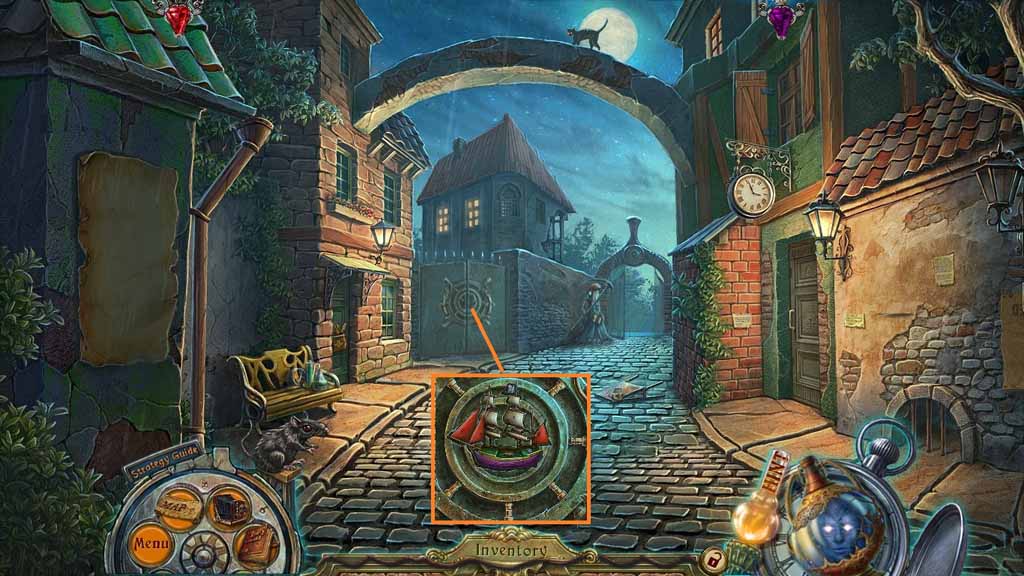
- Insert the toy ship into the gate lock.
- Enter the gate.

- Select the photograph to place onto the scene.
- Collect the puzzle piece and the photograph.
- Click the air pump.
- Click the boat; select the knife to slice the tarp and trigger a hidden objects area.
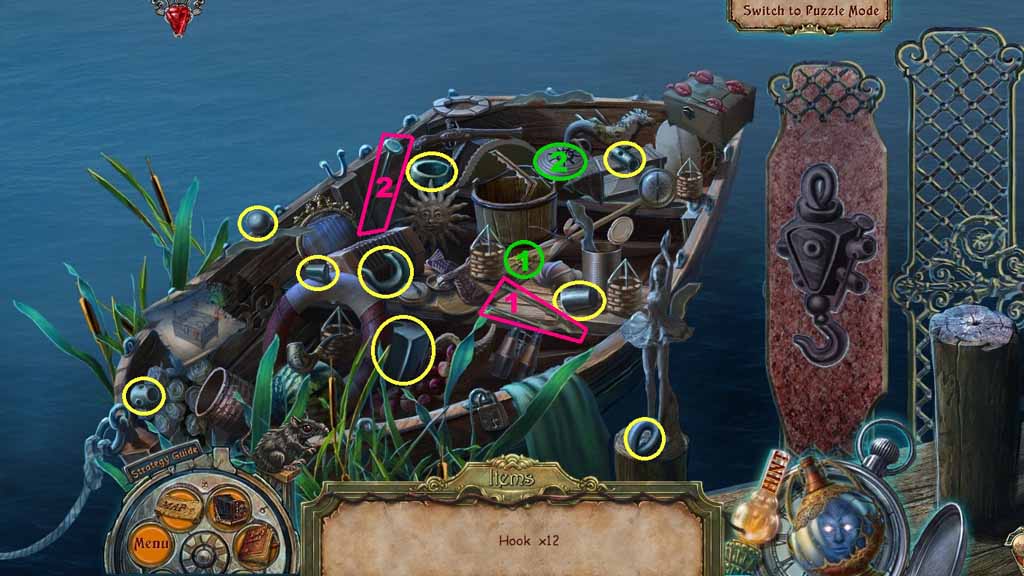
- Find the hook parts.
- Select the ship wheel and insert it into the groove; collect the hook part.
- Select the nail puller and use it to remove and collect the nail.
- Collect the hook.
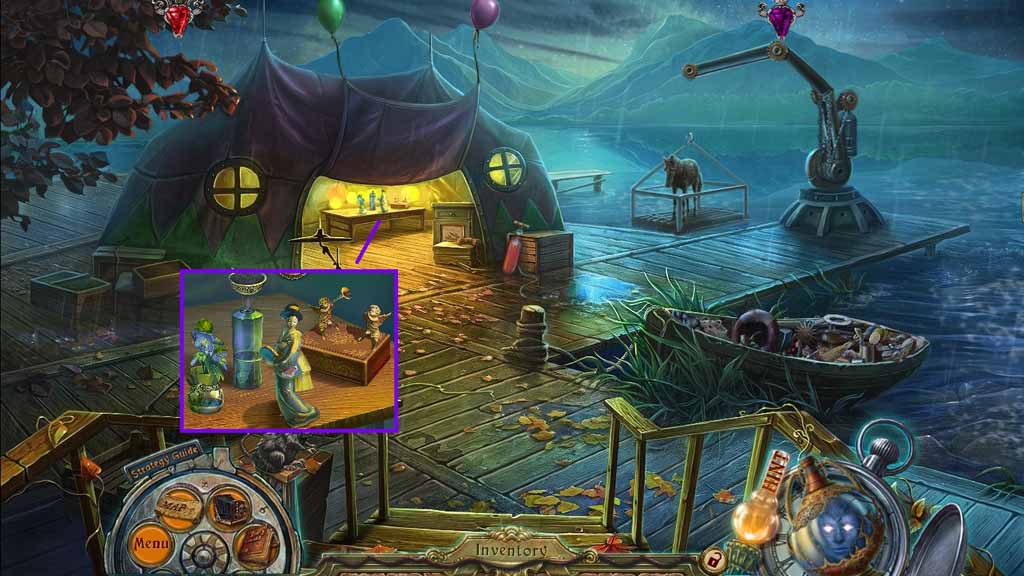
- Collect the Greek valerian and the geisha statuette.
- Place the funnel into the bottle.
- Select the glass to pour into the bottle; earn the glass.
- Move down once and go to the left.
- Place the hook onto the chain; collect it.
- Collect the drumstick.
- Move down and enter the gate on the left.
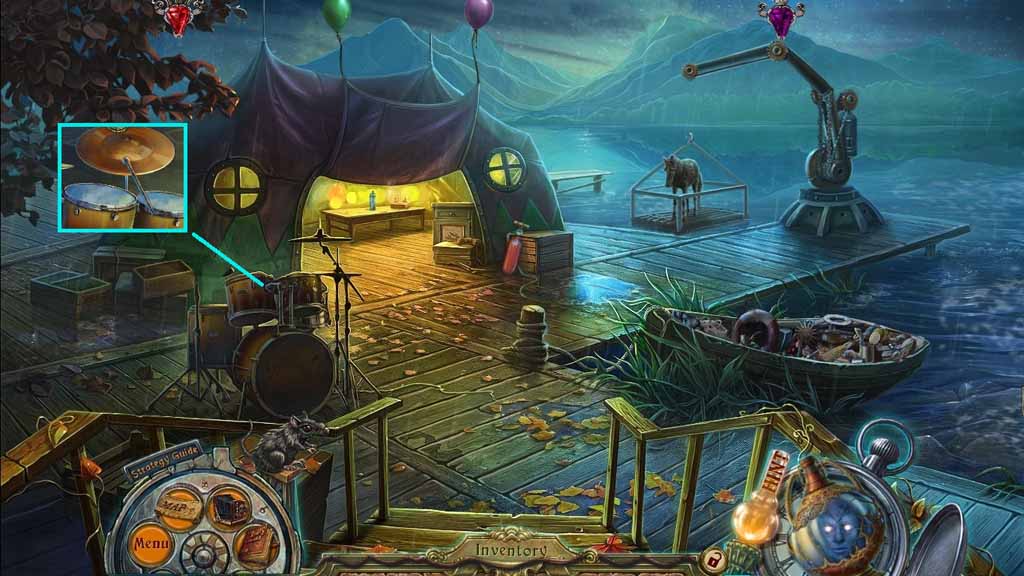
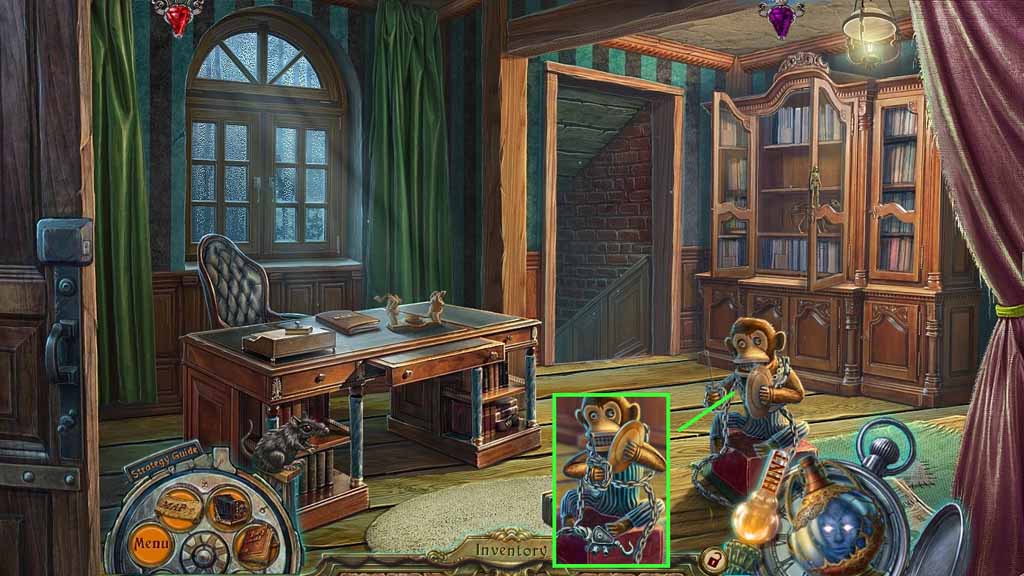
- Select the drumstick to collect the cymbal.
- Move down once and to the left.
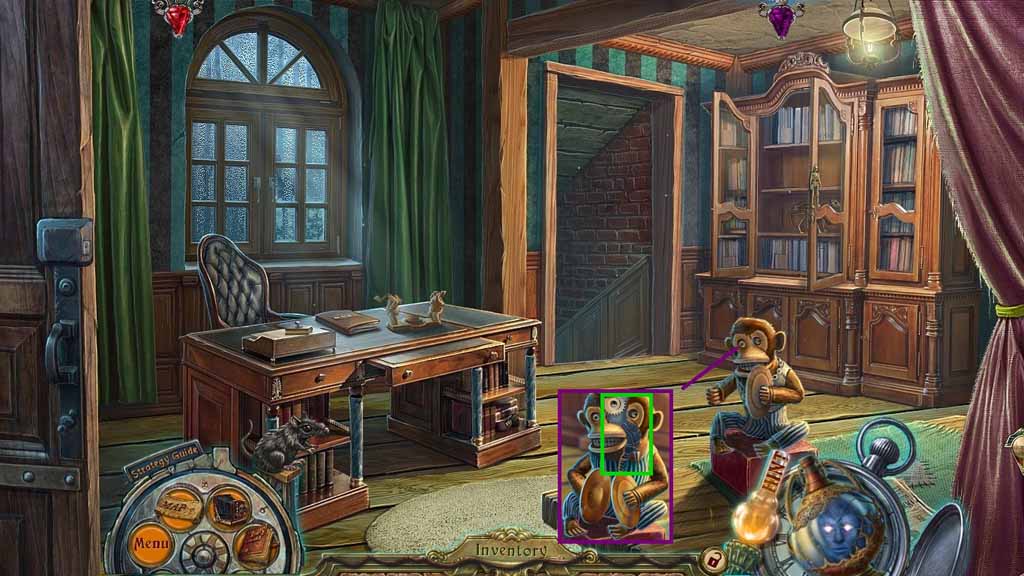
- Select the cymbal and give it to the monkey.
- Collect the gear and the pendulum.
- Move to the Pier.
- Place the hook with chain onto the winch arm.
- Select the gear and place it onto the winch; click the winch.
- Select the Reborn One to use on the pony.
- Move to the Pharmacy.
- Place the glass beneath the spigot.
- Place the spice berries onto the table; click the berries 3 times.
- Click the device to squeeze the berries; collect the spice berry juice.
- Move down once and go into the Museum.
- Click the latch on the left.
- Place the puzzle piece onto the portrait to trigger a mini game.
- Solve the game by clicking and dragging the strips to restore the portrait.
- Collect the fiddlestick.
- Place the geisha statuette onto the handle.
- Collect the silver thread.
- Move to the Cemetery.

- Select the fiddlestick to place on the statue.
- Select the Reborn One to use on the statue.
- Click the medallion; collect the puzzle piece and the heart shaped medallion.
- Move to the Museum.
- Click the handle on the right.
- Select the puzzle piece to use on the painting to trigger a mini game.
- Solve the game by switching the pieces around to restore the painting.
- Insert the heart shaped medallion into the box; collect the comb.
- Move to the Pier.

- Select the comb to collect the black cat from the horse’s mane.
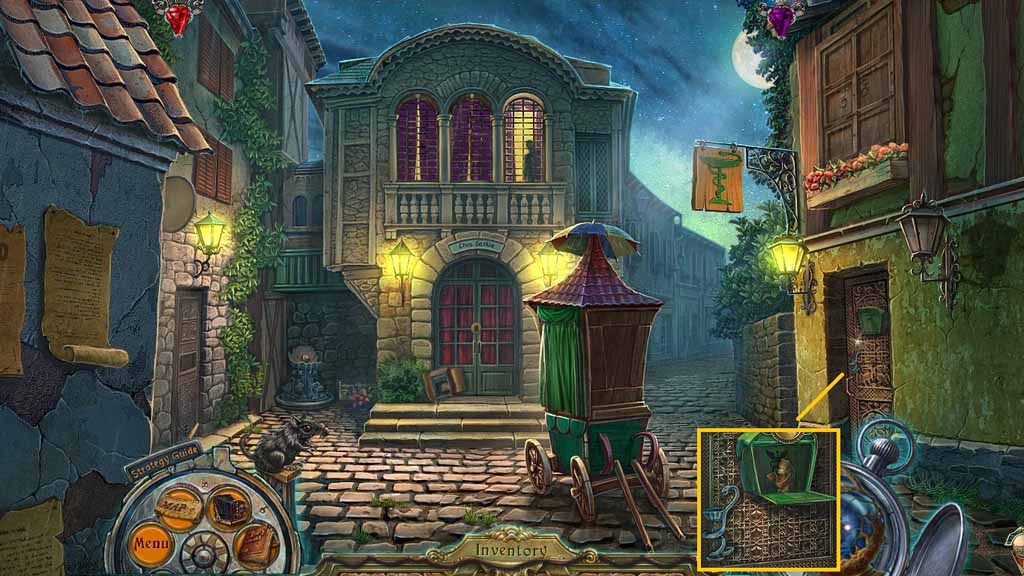
- Click the boat to trigger a hidden objects area.
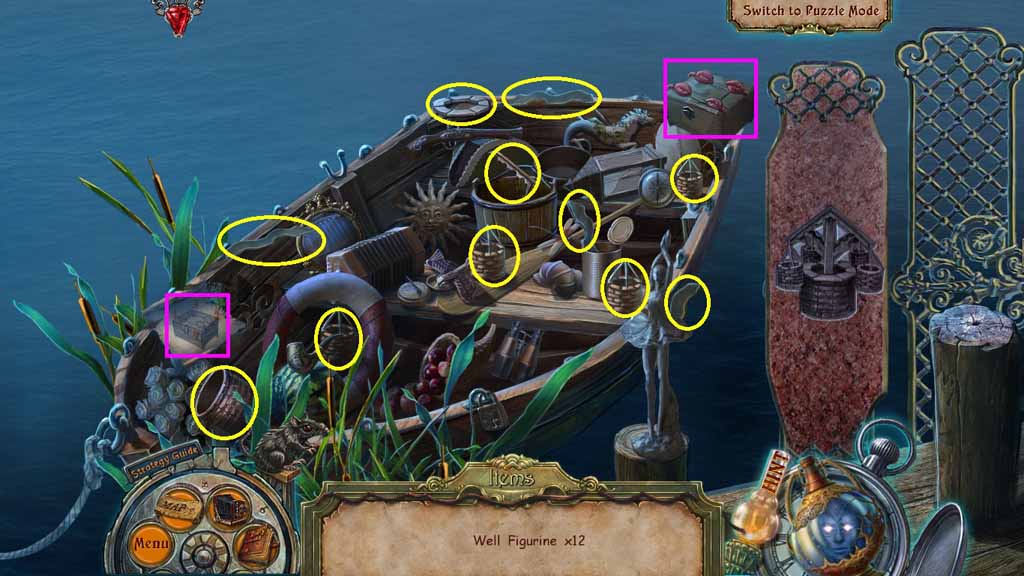
- Find the well figurine parts.
- Select the diagram for clues to open the lock box; collect the well figurine part.
- Collect the well figurine.
- Move to the Museum.
- Place the red mask, the black cat, the pendulum and the well figurine onto the frame.
- Collect Poe’s feather.
- Move to the Cemetery.
- Place the Poe’s feather onto the statue.
- Collect the leather.
- Move down 2 times, move to the left and them move ahead.
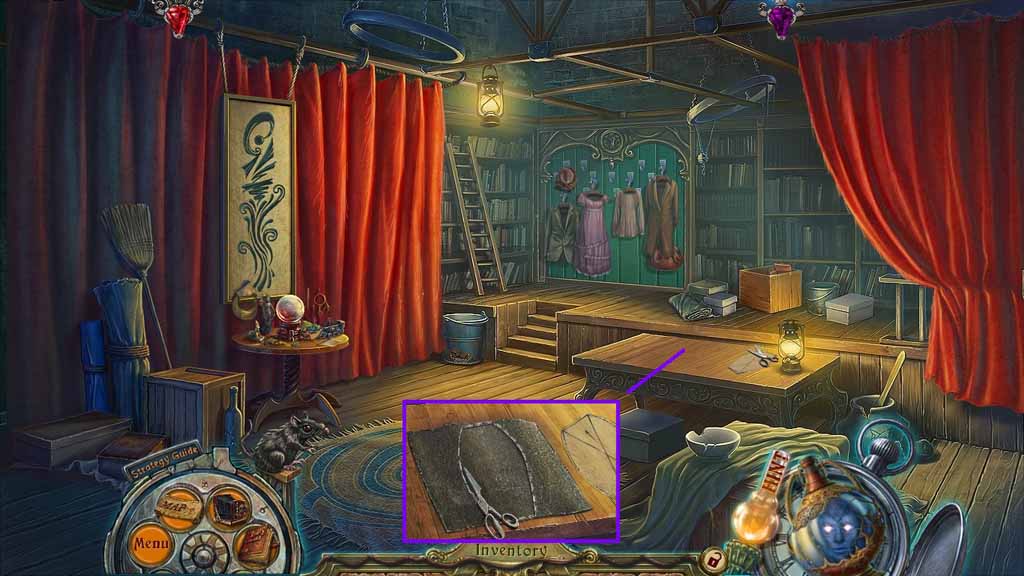
- Place the chalk and the leather onto the table.
- Place the pattern onto the leather and select the chalk to use on the pattern.
- Select the scissors to cut the leather; collect the cutout pouch.
- Move down once and click the sewing machine.
- Place the needle, the silver thread and the cutout pouch onto the machine.
- Select the needle to use on the spools and then the cloth to embroider the colors.
- Embroider the pattern without retracing any paths.
- Collect the leather pouch.
- Move to the Basement.
- Click the table and place down the scroll, the Greek valerian, the bone flour, the jar of salt, the spice berry juice and the leather pouch onto the table.
- Read the scroll.
- Place the Greek valerian and the spice berry juice into the mortar and select the pestle to crush them.
- Pour the contents along with the bone flour into the pot.
- Click the flame and stir the pot.
- Select the jar of salt to place into the pot.
- Pour the pot into the pan.
- Select the bottle to use on the pan.
- Place the pan mix into the pouch; collect the witch’s pouch.
- Move to the Graveyard.
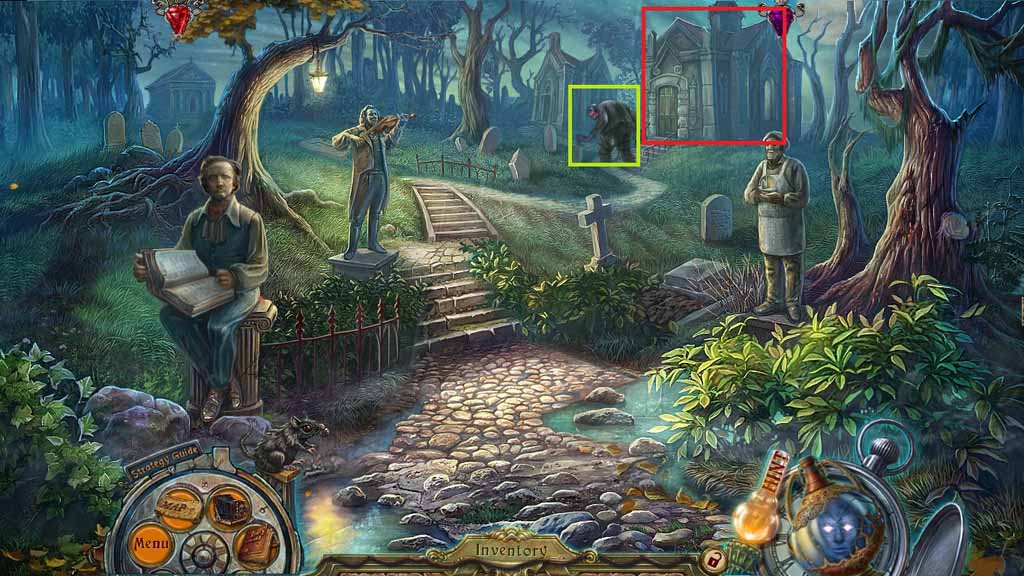
- Select the witch’s pouch to use on the ghost.
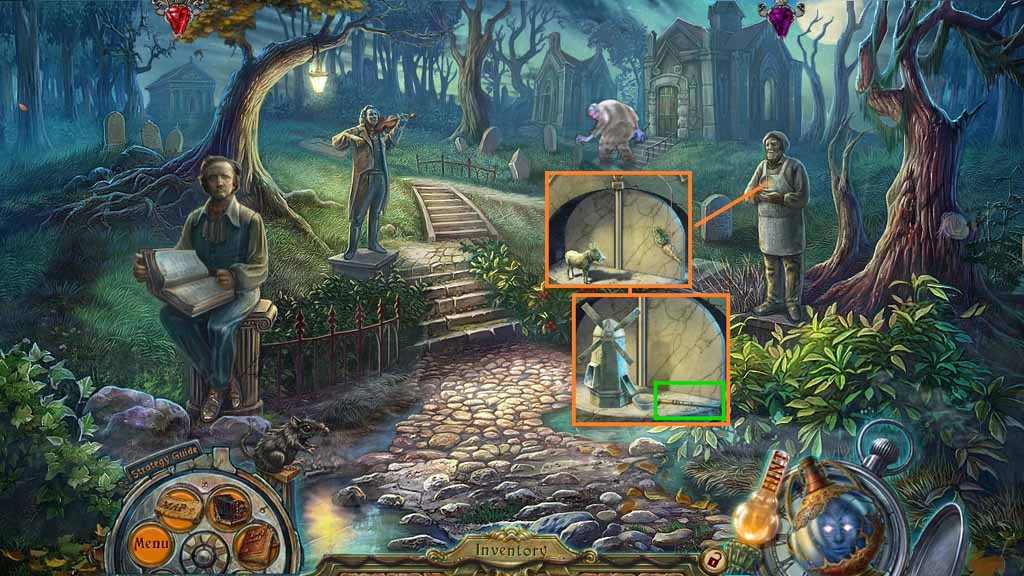
- Move ahead and click the casket to trigger a hidden objects area.
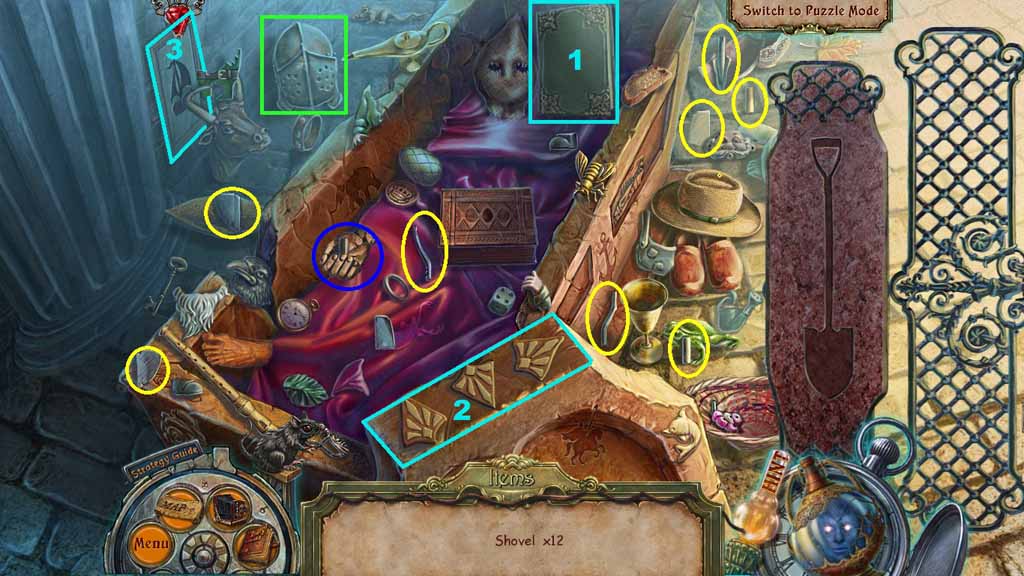
- Find the pieces of the shovel.
- Click the hand and collect the shovel piece.
- Click the book open and click the stones based on the clues; collect the shovel piece.
- Click the helmet; collect the shovel piece.
- Collect the shovel.
- Move down once.
- Select the shovel to dig up the dirt.
- Collect the Seraph’s wing and the skull.
- Move ahead.
- Attach the Seraph’s wing to the statue.
- Collect the horn.
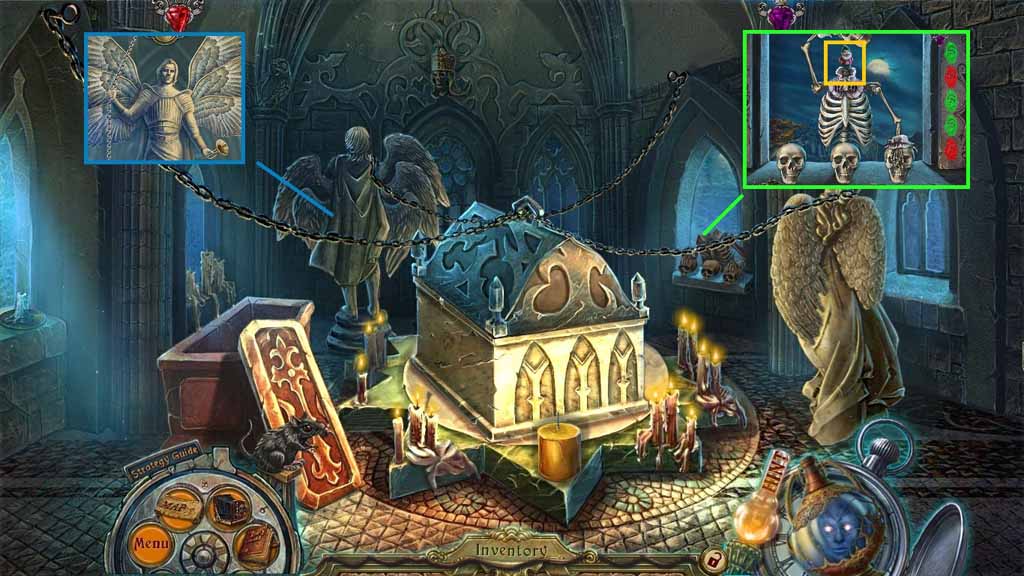
- Click the window and place the skull onto the skeleton to trigger a mini game.
- Solve the game by finding the gnome once the movement stops.
- Win 3 times and collect 1 / 4 garden gnomes.
- Move to the Pier.
- Attach the horn onto the angel.
- Collect the angel’s feather.
- Move to the Crypt.

- Attach the angel’s feather onto the statue to trigger a mini game.
- Solve the game by selecting the feathers out to the correct lengths.
- Collect the key.
- Move to the Basement.
- Select the key to insert into the lock.
- Click the cloth; collect 2 /4 garden gnomes and the potion.
- Move to the crypt and click the casket to trigger a hidden objects area.
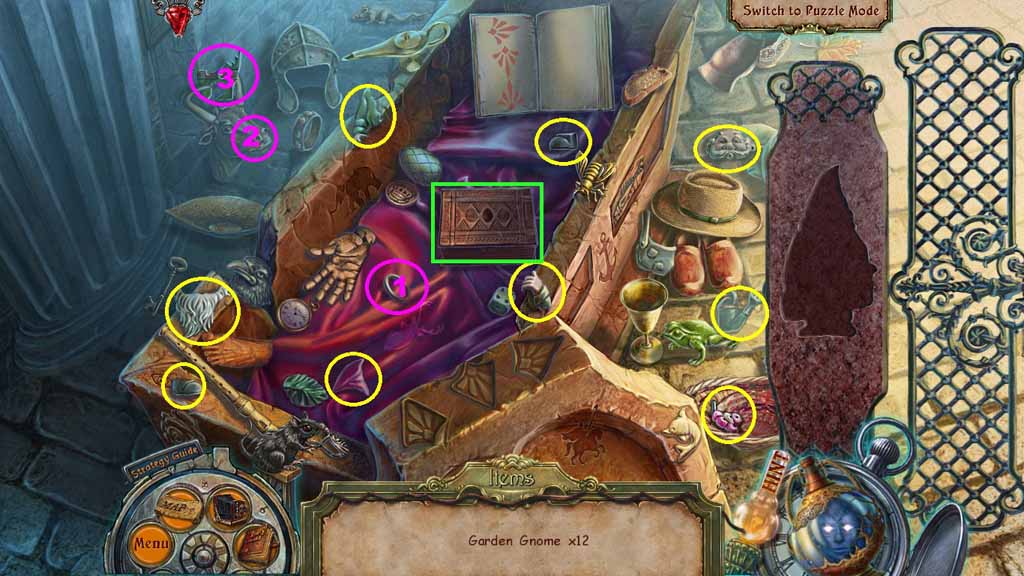
- Find the garden gnome pieces.
- Click the box; collect the garden gnome piece.
- Select the ring and place it into the bull’s nostrils; collect the garden gnome piece.
- Collect 3 /4 garden gnomes.
- Move down 4 times and enter the House.
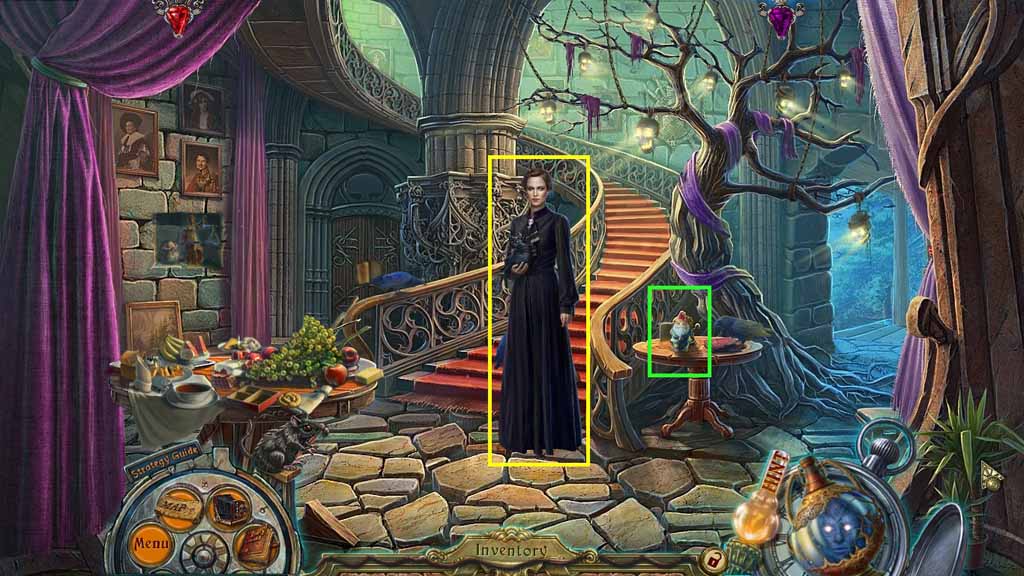
- Speak to Estelle and give her the potion.
- Collect 4 / 4 garden gnomes.
- Move down once.
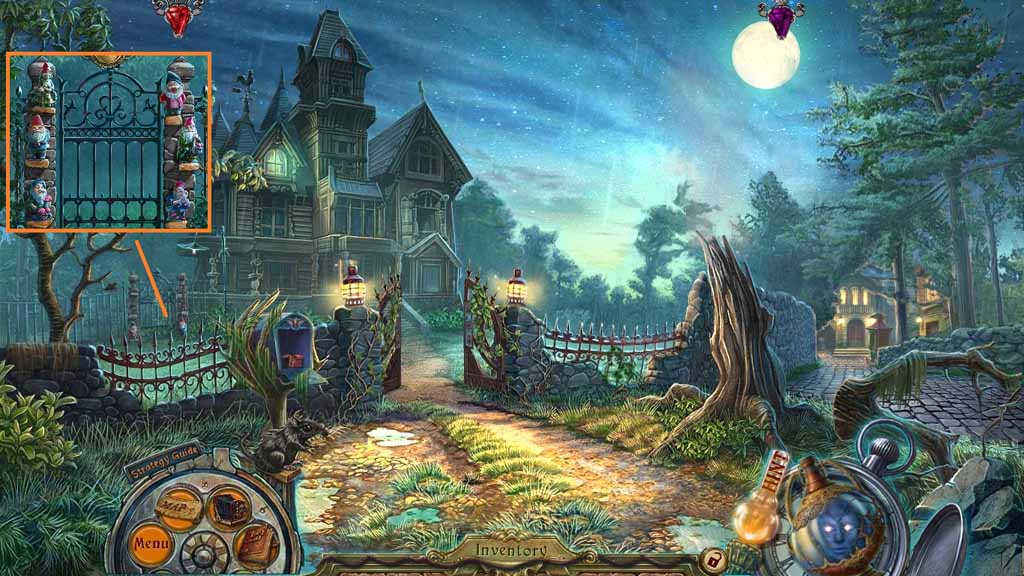
- Place the 4 garden gnomes onto the gate.
- Move into the gate.